I also posted this on Woodnet....if you want to see the first prototype, you'll need to go there and follow the link in there since I cannot link to woodnet.
I posted the first protoype earlier and here is the second go around. In short, the changes are:
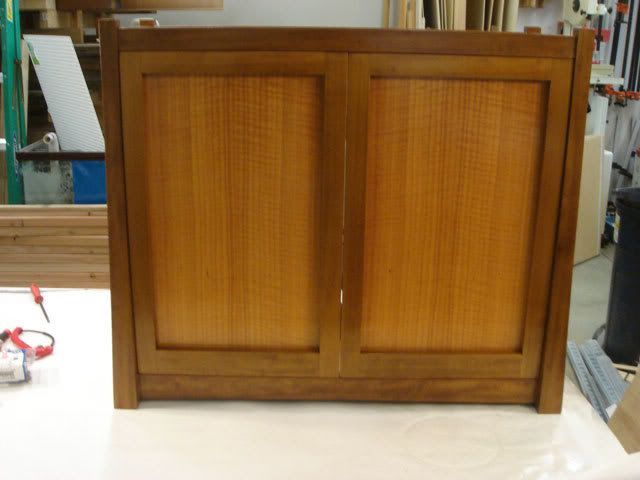
1. Top front rail and top door rails are the same width, unlike prototype 1.
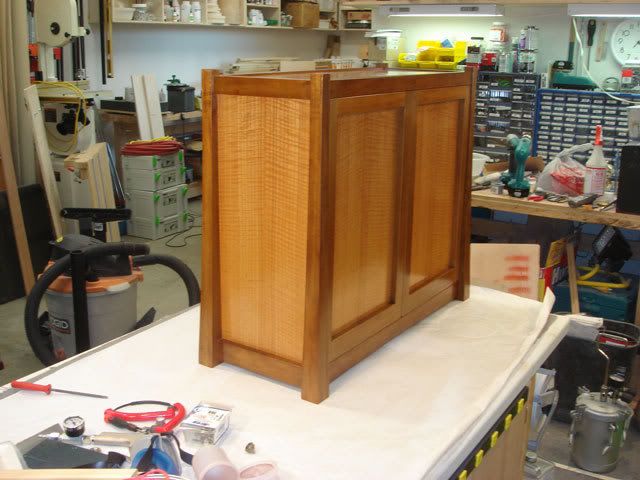
2. Leg curves are slightly different. In prototype 1, the curve started at the very top of the door and ended ~3 inches from the bottom of the leg. In this version, the curve goes all the way to the bottom. I like this version better. It isnt much less material, but the leg looks more refined by having the curve go all the way to the bottom. I think that part of why having less material at the bottom of the legs looks better than having more material is that the frames already lend a bottom weighted appearance. The bottom rails are wider than the top rails and shaving a bit of material off the bottom of the legs makes for a more pleasing overall weighting. The legs are still quite larger at the bottom than the top .just not as much so as in prototype 1.
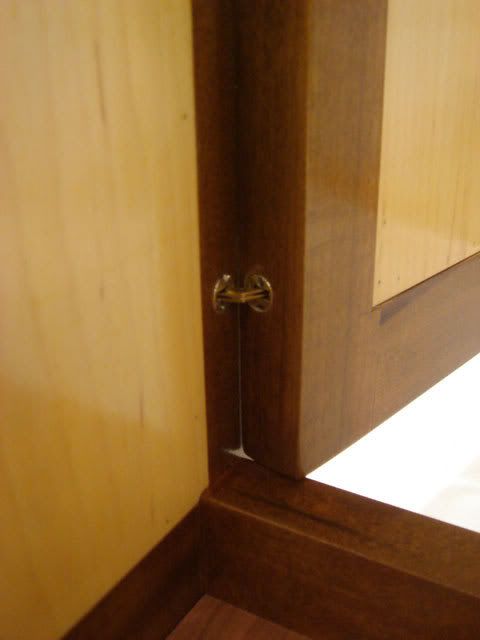
3. Barrel hinges are forward of the center line in the door stiles. This allows them to open 90 degrees without needing to bevel the door stiles, unlike prototype 1. Also the hinges come from Lee Valley. The 10 mm hinges really need a slightly bigger hole than 10 mm. I use a 13/32 bit instead. You want the hinges to go in with just a slight amount of hand pressure so you can fit doors (or lids if building a box) and still remove the hinges without damaging the relatively frail hinge mechanism. For more dense woods, you probably want the hinges to slide in without any resistance otherwise getting them back out will probably break the hinge. Also, the set screws on the 10 mm barrel hinges require a smaller than standard flat screwdriver head. A 3/32 wide tip works great from the jewelers screwdriver set the Lee Valley sells.
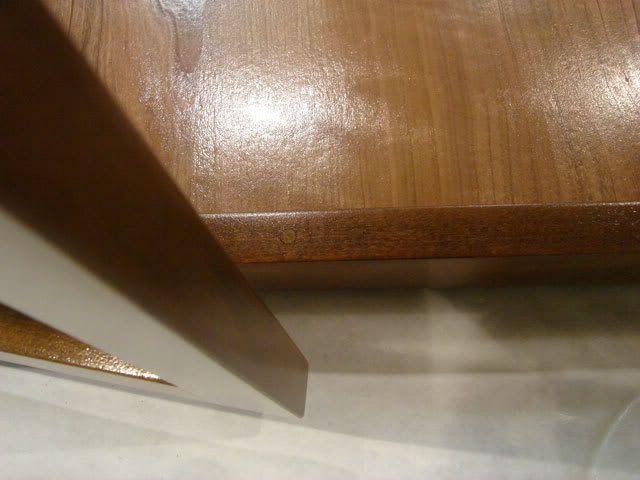
4. I employed magnets as stops one should be careful about freehand drilling the mortises for the magnets. I suspect I bored a hole out of square and this has one corner of a door a bit out of plane.
5. Coloring. I used a significantly more dilute dye solution this time around and added a bit of red to the dye rather than toning with red. Protoype 1 is quite dark .and in this version I did not dye the veneered curly anigre panels. The panels were oiled with BLO and topcoated with the frame.
6. Im getting better at HVLP the finish off the gun is better. Not as much orange peel and more uniform than prototype 1. I resorted to spraying each of the 6 faces as horizontal surfaces rather than trying to spray vertical surfaces. The topcoat is Target Coatings Ultima Spray Lacquer. Great stuff.
I realize some of the differences are really difficult to discern from the photos I post.

 Reply With Quote