Page 1 of 2 12 LastLast
Results 1 to 15 of 27

Thread: Infill brainstorm

  1. #1
    Join Date
    Nov 2006
    Location
    Kentucky
    Posts
    368

    Infill brainstorm

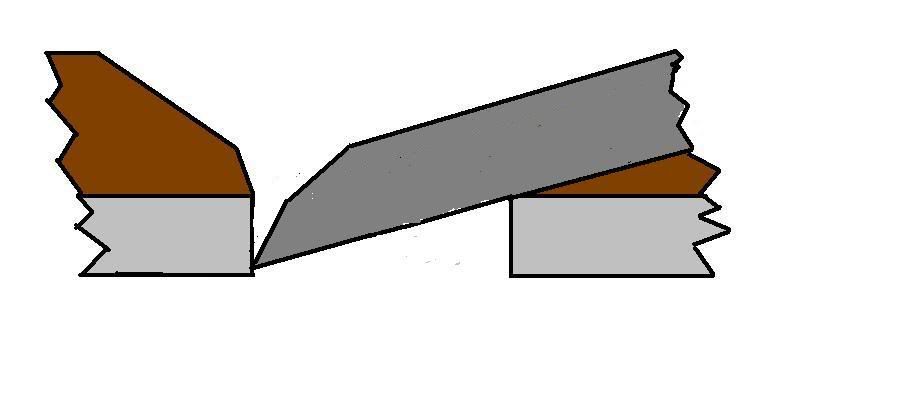
    OK, I'm thinking real hard and umm... taking time from my schoolwork() to sketch ideas for an infill. I've got the bed from a Sargent made Craftsman thats going to be perfect for it. I just have a few questions. How do I mill out the insides of the bed?-and-What do you think about this initial rough sketch? This plan is going to have Bailey adjustments in a east Indian rosewood frog/handle, yup I'm shooting for the sky. Thanks in advance. Maybe I will be able to get the picture to attach.

    -Ryan C.

    PS- Please forgive the sloppiness of the attachment.
    EDIT: Forgot to say that this will most likely not be used for anything except conversation due to the inherent fragility of the wood and the pressure of the adjustments.
    Attached Images Attached Images
    Last edited by Ryan Cathey; 01-12-2007 at 9:56 PM.
    -Ryan C.

  2. #2
    Join Date
    Feb 2004
    Location
    Perth, Australia
    Posts
    9,497
    Ryan

    I've built two infills out of Stanley planes, a #4 and, very recently, a #3 (below, 60 degree cutting angle, 7 1/2" long).


    I milled out the bed with a small 4" hand angle grinder and a Dremel - not exactly high tech!.

    The article with more info is at http://www.wkfinetools.com/contrib/d...ootInfill1.asp

    The #4 was built some years ago and looks like this:

    55 degree bed, LN blade, Mathieson cap iron

    Your drawing looks great. But just remember - it is NOT an infill unless the bed is wood. You cannot use the Stanley frog.

    Regards from Perth

    Derek
    Last edited by Derek Cohen; 01-13-2007 at 10:55 AM.

  3. #3
    Quote Originally Posted by Derek Cohen
    I've built two infills out of Stanley planes
    Very interesting. I'd never heard of this method. Do you use the original throat from the Stanley body, or do you fill it and cut another? How clean did you make the iron body before adding the wood? Are the handle bolt holes still there etc? Did the outside of the sole and sides change shape as you removed metal from the inside?
    Please consider becoming a contributing member of Sawmill Creek.
    The cost is minimal and the benefits are real. Donate

  4. #4
    Join Date
    Nov 2006
    Location
    Kentucky
    Posts
    368

    Clarification

    Perhaps I wasn't clear earlier. It's going to be a closed handle(as shown in the picture) and just like a regular Bailey plane the brass adjustment wheel, yoke, lever clap, and blade/chip breaker assembly will be used. All of this is going to put in a frog made of wood. Yeah, I'm pretty confident.

    -Ryan C.
    -Ryan C.

  5. #5
    Ryan,

    Just a note. If you look at Derek's infills, you will see that (a) the wood is pinned to the sides, and (b) the lever cap is also pinned to the sides. What happens is that when the lever is tightened, the infill bedding, the sides, the bottom, and the blade assembly are pulled together as tight as a baseball. The whole assembly becomes like a monolith. This is (IMO) what makes an infill perform--this quality of becoming like a rock when the lever is tightened.

    A Stanley, on the other hand, has the frog, the blade assembly, the adjuster, and the lever all anchored to the bottom (only). Everything depends on the quality of the machining of the mating surfaces, plus two screws at the bottom. The Stanley is made like this so that the frog can move.

    I can't make out from your drawing whether you intend to make your plane rigid like an infill, or movable like a Stanley. But it's something to think about.

    Wiley

  6. #6
    That's a beautiful plane, Derek. I was just thinking that those of us who don't have the ability to make a brass lever cap could just drive a screw (with the proper type of head) into the wood and use the regular lever cap, chip breaker, and iron. Wouldn't look as trick as yours but seems like it would work.

    One question I have is how did you adjust everything so the mouth would be very tight (assuming it's going to be used as a smoother)? Do you fit everything and then move the rear piece of wood forward - with the iron in position - until the mouth is tight before you fasten the wood into position?

    Mike
    Go into the world and do well. But more importantly, go into the world and do good.

  7. #7
    Join Date
    Nov 2006
    Location
    Kentucky
    Posts
    368
    That's what I was planning on doing Mike. Like I said in my first post, it probably wouldn't be used very much but I think it would be neat to have. Just an experiment of sorts I guess.

    -Ryan C.
    -Ryan C.

  8. #8
    Join Date
    Nov 2006
    Location
    Kentucky
    Posts
    368
    Wiley, It is going to be rigid and pinned to the sides likes a standard infill.

    -Ryan C.
    -Ryan C.

  9. #9
    Join Date
    Feb 2004
    Location
    Perth, Australia
    Posts
    9,497
    Quote Originally Posted by Mike Henderson
    ... I was just thinking that those of us who don't have the ability to make a brass lever cap could just drive a screw (with the proper type of head) into the wood and use the regular lever cap, chip breaker, and iron. Wouldn't look as trick as yours but seems like it would work.
    Hi Mike

    There are "ways and means" (i.e. cheats) to get the results needed.

    The lever cap and lever cap screw, the latter especially, are daunting for most. I have the least impressive array of metal working tools - an angle grinder, a metal cut-off saw, a belt sander, files, and a drill press.

    The lever cap is just cut to rough shape, the cap screw hole is drilled and tapped for a thread, then the remainder of the cap is filed and sanded to shape. This is fairly easy (unless you use the brass I used, which is extremely hard).

    The cap screw is a cheat. It involved epoxying together a brass garden hose connector with a brass threaded bolt, and then attaching a coin at the top (to finish and conceal), the metal here chosen to compliment the colour of the lever cap. The coin is then filed to shape. Some of this is documented in the article (address above) and more in another I wrote on renovating an infill.

    One question I have is how did you adjust everything so the mouth would be very tight (assuming it's going to be used as a smoother)? Do you fit everything and then move the rear piece of wood forward - with the iron in position - until the mouth is tight before you fasten the wood into position?
    I did not explain this well before. Basically, I build the infill bed first, then fit this - along with a fiinished blade (then I am using known dimensions) - so that the edge of the blade just lies below the surface of the sole. Like so ..


    One of the opportunities you have at this point is to make sure that the bed's lateral angle is square to the sole (i.e. the blade is level with the sole). Hence another need to use a finished blade.

    Once the plane is complete (sides pinned, sole flattened, etc), then I carefully file the mouth until the blade begins to clear the end. This allowed me to make this mouth extremely small, and I have been rewarded with a plane that will take very fine shavings.

    I hope this encourages you to give it a go.

    Regards from Perth

    Derek

  10. #10
    Join Date
    Mar 2003
    Location
    Santa Barbara County, CA
    Posts
    499
    Nice post.

    Thank you.

  11. #11
    Join Date
    Feb 2004
    Location
    Perth, Australia
    Posts
    9,497
    Quote Originally Posted by Ryan Cathey
    Perhaps I wasn't clear earlier. It's going to be a closed handle(as shown in the picture) and just like a regular Bailey plane the brass adjustment wheel, yoke, lever clap, and blade/chip breaker assembly will be used. All of this is going to put in a frog made of wood. Yeah, I'm pretty confident.

    -Ryan C.
    Ryan

    You may want to look at this one - very similar to what you plan.

    http://www.geocities.com/PicketFence.../stinfill.html

    Regards from Perth

    Derek

  12. #12
    Join Date
    Nov 2006
    Location
    Kentucky
    Posts
    368
    Thanks Derek, I was hoping to hear from you. BTW how is the weather down there now. I went the summer between my 8th and 9th grade year. Sure was beautiful. About how far away is Perth from places like Melbourne, Brisbane, or Sydney. We went to a bunch of other places but that's all I can really remember, that and staying in The Menzies(Sp?) in Sydney. Now that is a nice hotel!

    -Ryan C.
    -Ryan C.

  13. #13
    I've been following Derek's post in hopes of making my own "stanley" infill. One of the things that concerned me as well is the lever cap. I'm told that St JAmes Bey Tool Co. sells parts and kits for their planes and that a lever cap can be purchased a reasonable price. I haven't contacted them yet.

    Michael

  14. #14
    Join Date
    Feb 2004
    Location
    Perth, Australia
    Posts
    9,497
    Quote Originally Posted by Ryan Cathey
    Thanks Derek, I was hoping to hear from you. BTW how is the weather down there now. I went the summer between my 8th and 9th grade year. Sure was beautiful. About how far away is Perth from places like Melbourne, Brisbane, or Sydney. We went to a bunch of other places but that's all I can really remember, that and staying in The Menzies(Sp?) in Sydney. Now that is a nice hotel!

    -Ryan C.
    Ryan

    Perth is on the west coast of Oz. Sydney is on the east coast. Think California to New York distance!

    It is Hot at present.

    Regards from Perth

    Derek

  15. #15
    Join Date
    Nov 2006
    Location
    Kentucky
    Posts
    368
    Oh! WOW! I had to wear a jacket a few times when I was there. Once again it sure is beautiful there. I would really like to go back. Oh yeah, rugby is a lot more fun to watch than football lol. One more question. How do I go about pinning the infill to the bed?
    -Ryan C.

Similar Threads

  1. Infill planes equal big dollars
    By Ken Garlock in forum Neanderthal Haven
    Replies: 46
    Last Post: 07-07-2006, 1:10 PM
  2. Renovation of a Spiers infill smoother
    By Derek Cohen in forum Neanderthal Haven
    Replies: 9
    Last Post: 04-28-2006, 7:02 AM
  3. The problem with those lovely infill planes….
    By Bob Smalser in forum Neanderthal Haven
    Replies: 3
    Last Post: 11-07-2004, 4:25 PM
  4. Infill finished
    By Rolf Schmid in forum Neanderthal Haven
    Replies: 2
    Last Post: 05-25-2004, 3:37 AM

Posting Permissions

  • You may not post new threads
  • You may not post replies
  • You may not post attachments
  • You may not edit your posts
  •