Jim,
I admire your courage drilling into the cast iron of your expensive new router top. Great pictorial as always.
Dave


 Member
Jim,
I admire your courage drilling into the cast iron of your expensive new router top. Great pictorial as always.
Dave
 Member
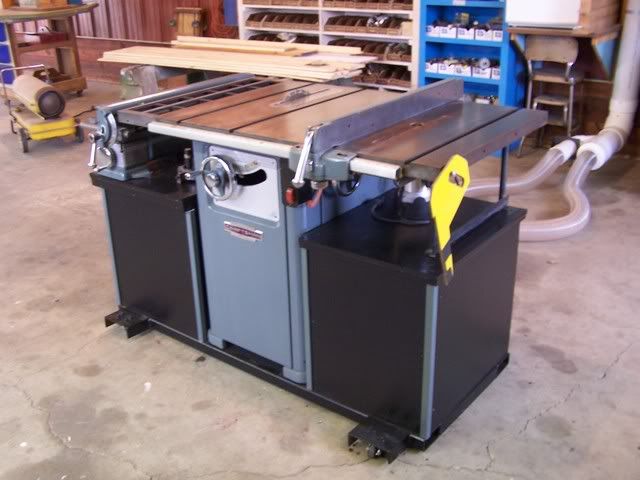
I agree with Jim on the cast iron being rock solid and vibration free, mine is an extra table saw top used for an extension and router table. The router is bolted below the extra saw blade slot. In the picture I don't have the router fence on the router part of the table.
I too am building a new router fence to add dust collection for it, but will only be sucking from the fence and not underneath, I'm not sure how well that will work but will find out soon.
Will post pictures of new fence when completed.
By the way Jim very nice professional looking work and I didn't mean to hijack your post
Have a nice day
Jeff
Member
Jim, You did a great job on your sliding router attachment, I've already put mine to good use, your going to love it..
Regards,
Wayne
Member
Jim said "I do need to do some additional adjustment to the rip fence rail, however...I need it to be a little smoother and think I missed on the alignment just a little when I originally mounted it"
Jim, I shim the front or back of the fence with paper for a quick fix and also to see if there is in fact room for improvment.
Jim,
Great pictorial and a beautiful job of making an add-on look like a factory option. Send a pic to the sawmaker and thank them for "offering this great new option" . . . It'll freak 'em out!
"A hen is only an egg's way of making another egg".
Samuel Butler
 [OP]
Moderator
[OP]
Moderator
The issue is with the fence rail positioning adjustments. Since it's a round rail, there is nothing to shim. The interim "fix" has been to release the lever that allows front to back fence adjustment (it slides back and forth) when I move it over the extension table to store it out of the way. The extension table needs re-leveling once I loosen the fence rail bolts as part of the final adjustments. This isn't a big issue...I just haven't taken the time to deal with it.Originally Posted by Ed Kowaski
--
The most expensive tool is the one you buy "cheaply" and often...
Member
ahhh I thought you meant the fence to blade and wagon alignment. That is easy to shim. Loosen the aluminum fence clamp insert the shim to the front or back of the casting depending on which way you'd like the fence to move and tighten the clamp.
I had to fiddle with what you speak of as well. I find keeping the bar waxed really makes a difference too. Takes a while to get this stuff all dialed in but it's fun. The fence rides on the clamp bolts, I don't like that, think I may put a piece of something there for it.
[OP]
Moderator
The fence is dead on to the blade...no shimming necessary. My issue is mis-alignment of the fence rail vertically which affects sliding the fence back and forth. It's not the fault of the machine...the "assembler" didn't do it correctly...
--
The most expensive tool is the one you buy "cheaply" and often...
Member
Jim,
Do you know the dimensions (how far from the side and space in between) of the 3 hole pattern of the benchdog top on the side that you attach to the tablesaw? Thanks.
Paul
Last edited by Paul Sidbury; 03-25-2007 at 12:28 PM.
 Moderator
Beautiful work Jim and outstanding design and function. My hat is off to you my friend.

Thanks & Happy Wood Chips,
Dennis -
Get the Benefits of Being an SMC Contributor..!
....DEBT is nothing more than yesterday's spending taken from tomorrow's income.
Member
this is by far one of the most clever ideas! oldie but goldie!
[OP]
Moderator
Thanks, Rodrigo. It's been quite functional. I would like it better if I was able to access from the back and have more head-room, but due to the layout of my shop and a slanting stairway just behind the saw, that's not practical. The router is also positioned far enough away from the slider's wagon that it's also not too practical to try and use the wagon for material handling. A saw/shaper combo is much better in that respect, but such a tool wasn't in the cards financially when I was buying.
I will also note that if I needed to make this router setup independent of my slider, it wouldn't be too difficult to make that happen. Fortunately, I do not believe that will ever be required unless I win the PowerBall lottery and can build a much larger shop.
--
The most expensive tool is the one you buy "cheaply" and often...
 Contributor
I'm glad you liked the Bench Dog lift system, including profence. I've been using the earlier style lift for years and been satisfied. I refer to it as bullet proof. Once in a while I think about switching to an all aluminum fence, but if it's good enough for you, then my choice was justified. Beautiful work as always. Congrats. Thanks for sharing.
Real American Heros don't wear Capes, they wear Dogtags.
 Posting Permissions

 Reply With Quote