


I had a visitor today in the form of Mike, a primary school teacher, who was setting up a woodworking program for his kids at school. What is exemplary, he is doing this on his own initiative and out of his own pocket. Several Perth members of the Ubeaut woodworking forum had donated planes. When I heard of Mikes wonderful effort I felt that the least I could do would be to hone the blades, tune the planes and ready them for use.
Of course, little did I know that this involved 8 of the most abused and rejected planes four #4s and four block planes all cruddy and warped. But thanks to the miracle of electricity and a large belt sander, all soles were flattened, all blades and chip breakers derusted, blades ground and honed to razor edges, and planes tuned to take fine shavings. And in just 3 hours!
I anticipated that Mike would need some strategy to maintain the sharp edges. So I came up with The 10 cent Sharpening System, which actually cost me nothing since I just used a few scraps lying around. I consider that this is really quite a serious sharpening system and others might enjoy using it since it is very compact and works very well. Mike timed me taking a blade with a rough primary bevel to a razor edge in under 30 seconds.
None of this system is original. Just my adaptation in this package, which I consider perfect for thin Stanley blades.
At this price we are talking Scary Sharp, that is, the use of wet-and-dry sandpaper as the sharpening medium. I only used only one grit 600 but I later made provision for lower grits as well. In addition to the 600 grit W&D, I used .5 micron Veritas green rouge.
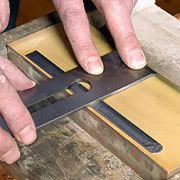
For a honing guide, the best at the price (5 cents) is the jig designed by Brent Beach
http://www3.telus.net/BrentBeach/Sha...ation.html#jig
No, just kidding. This is a cracker of a jig at any price as used in this type of system.
Here is Brents jig.
Where Brent uses a glass substratum, I built Mike's from an offcut of MDF. The honing guide was just a block of Tasmanian Oak. I am not sure of Brents dimensions here, but I suspect that the one I built is lower (I used the same height as a Eclipse guide). The advantage is that the set up is more compact. The disadvantage is that the backbevel angle is 10 degrees, so micro backbevels need to be done as per David Charlesworths "Ruler Trick":
http://www.taunton.com/finewoodworking/pages/w00177.asp
So what is the system?
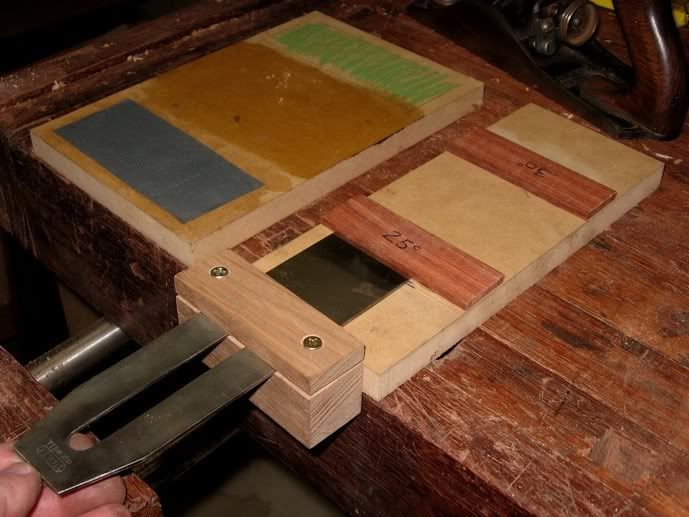
There are three parts: the honing guide, the honing board, and the guide angle set.
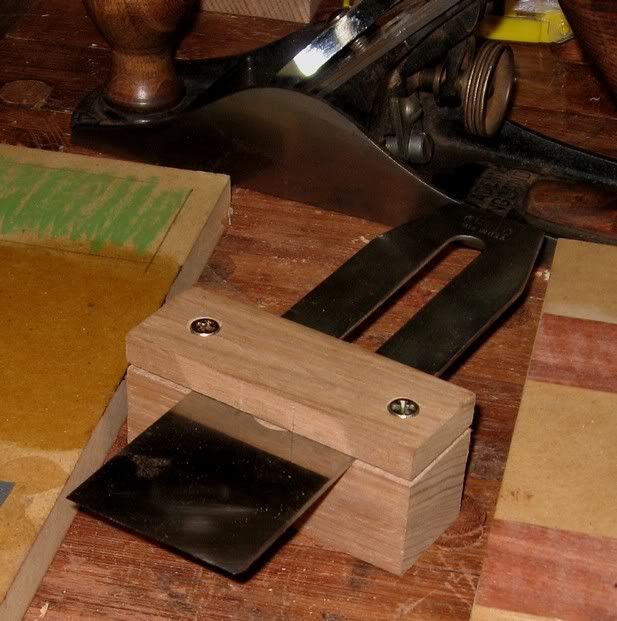
The honing guide
My Brent Beach copy:
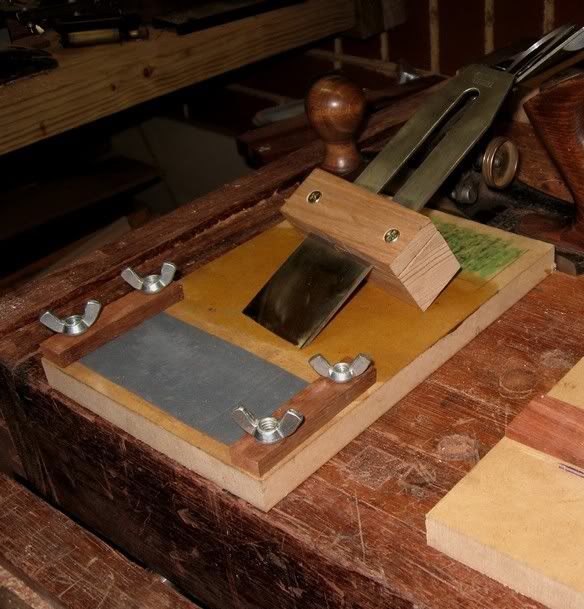
The honing board
What we have here is 600 grit W&D contact glued to the MDF. Later I realized that a better system would be to simply have two clamps (using bolts and butterfly nuts) so that sandpaper strips could be changed out.
The far end is a section with Veritas green rouge just scribble this on the MDF.
In between the two, the MDF surface is given a coat of wax to reduce friction.
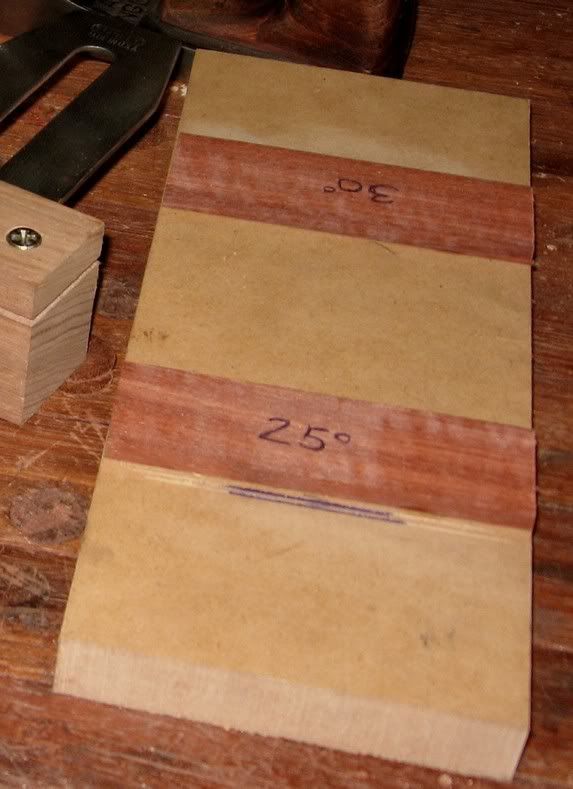
The Guide angle set
There are two elements here.
Firstly, the depth of projection is set for 25- and 30 degrees. This also automatically squares the blade in the guide.
Secondly, here I have drawn in lines for microbevels just shorten the projection to these lines. Later (again!) I realized that a better system would be to just use a shim (one for each reduction) placed against the fence to set the depth.
Method
Most know this process well.
1. Grind a primary bevel (I used 120 grit on a belt sander in this project). The Guide Angle Set will enable one to grind this at 25- or 30 degrees with sandpaper.
2. Hone a secondary bevel on the 600 grit.
3. Hone this further (same angle) on the green rouge.
4. Use the Ruler Trick to remove the wire edge (a particular boon on non-flat backs of blades).
5. Items 2-4 took about 30 seconds.
In summary, this system is optimized for thin Stanley blades. There are many ways to skin a cat but none cheaper or simpler for this purpose.
Regards from Perth
Derek


 Reply With Quote