Hi Derek,
Ya, I should have mentioned, most my planes are bevel up. What kind of belt sander do you prefer to use, one of those vertical ones? And I supose you just do it freehand on the belt sander?
Thanks.
Matt


 [OP]
Member
[OP]
Member
Hi Derek,
Ya, I should have mentioned, most my planes are bevel up. What kind of belt sander do you prefer to use, one of those vertical ones? And I supose you just do it freehand on the belt sander?
Thanks.
Matt
 Member
You could always pick up a hand crank grinder to put a hollow grind on your blade.
d
Sharpening skills, the plane truth.
 Contributor
Hi again Matt
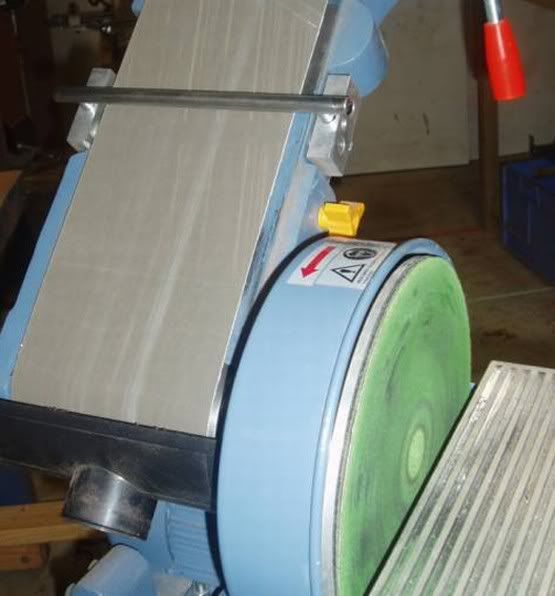
For a belt sander I use a 6" wide machine with a jig I designed that is similar to the one on a Tormek.
Use a 80 or 120 grit belt for the primary bevel.
The other bit of advice I'd like to pass on is that you should only buy blades with 25 degree primary bevels for BU planes. With the exception of a shooting board, I believe in adding camber to bevels. It is easier to camber a 25 degree primary bevel and add a secondary bevel of your chosen angle, than attempt to camber a high angled primary bevel. (I have an article on this, but cannot attach the link).
Regards from Perth
Derek
Member
I would like to second this very good point that Derek makes. Many people do not realize it, but it's a waste of time to buy (or to make) the 38 and 50 degree primary bevel blades for their planes.Originally Posted by Derek Cohen

Buy (or grind) a 25 degree primary bevel and then put a secondary micro-bevel on them at whatever angle you wish (38 degrees, 50 degrees, etc). Re-honing them then becomes much easier and less time consuming.
I had a long discussion about this with Peter at Lee Valley a few weeks ago during the Woodworking Show in New Jersey. He confirmed that the 38 and 50 degree blades are offered because it gives the "appearance" of a wider variety of blade angle options for the planes. In reality, however, when you get down to using the blades in practice, there is no good reason for having a 50 degree primary bevel.
 Contributor
There is an easy relatively painless solution for that!
I like my Veritas Mk.II power sharpening system. It cost a little more, but I feel it was worth the price.
I bought a spare tool holder and after the first time it was used, three more were bought. It is most efficient if one has a lot of sharpening to do. Five or more blades at a time seems to be a good balance to let one cool while the next ones are worked.
I do not put secondary bevels on my blades.
I also have a set of water stones for doing hand sharpening when something just needs a little honing. 220, 800, 4000 & 8000 are the grits on my big stones. I also have 1000 & 4000 slip stones.
Also have a very fine honing stone that was made for straight razors, but it can put a mirror on just about any blade. Once upon a time, I did not like shaving, nor did I like having a beard. So usually I would shave once every few months. When it got thick, a straight razor was the least painful way to hack it off.
I have oil stones, they seem slow, but get used occasionally.
Then there is loads of sandpaper and a hunk of granite for variety.
Each method has its advantages, just have not found them all yet.
jim
Member
I was thinking about the same problem a while ago and I did have (still do) the extra coarse diamond stone. It still took a long time to regrind a primary bevel in a piece of steel that large.
So I get a large (and very cheap for $5) hand granked grinder off a certain auction site. I put a norton 3X supercool 46 grit 8" grinding wheel on it with a grinding rest from veritas.
It is a great setup. It is almost impossible for me to get the steel even where it is hot to the touch and still the metal flies off the blade. With a light touch all it takes is seconds to hollow grind (if the secondary bevel is not too out of shape) I go to the 1K first then 4K then 8K. the disadvantage here is that with other stones you can go directly to the 4 or 8K but I chose speed of rough grinding over finish.
I highly recommend this setup if you have the inclination.
One more thing. the grinding stone only came with bushings to fit a 5/8" diameter arbor and the arbor (axle) on the hand cranked grinder is 1/2" so I posted in another forum that I was looking for that small piece of plastic, a 1/2" bushing. Sure enough someone had one lying around that they were not using but had not thrown out (I knew that there were others like me who don't throw out stuff like that) and they sent it to me. It worked great.
HTH
Peter
[OP]
Member
Thanks to everybody for all the great info! I ended up getting an extra course DMT stone, and so far it has worked well. I've only had the opportunity so far to do one blade, it took a bit of time but worked quite well. The diamond stone is nice because it stays sharp unlike sandpaper on the granite, and it will be great for puting a new edge on some knives I have.
Derek, I really like that belt sander setup you have! I think I will look into doing something similar. I saw your jig you made up for doing scrub plane blades. I have a scrub, and was not quite sure what the best way to grind it would be, but now I do.
I was a little leery about using a bench grinder, because it's just too easy to alter the temper of the blade. I have a few bench ginders (I do a good bit of metal fabrication) but the hand crank grinder would be a good alternatinve to keep it cooler, but I think I'd like to stay with flat grinds for now.
Thanks all!
Matt
 Contributor
I use a combination of the Lee Valley grinding jig and tool rest on an ordinary bench grinder for gross metal removal (like establishing a new bevel or regrinding a chisel rescued from a flea market), and the Lee Valley belt sharpening machine followed up by a hard felt wheel and green compound for routine sharpening and honing. I use the flat side of the wheel to take the wire edge off the back. I have the belt and felt wheel set up turning away from myself, also.
I still use the Scary Sharp system for flattening backs and sometimes for the initial sharpening on a factory iron, but for the A2 irons, this takes way too much time. Also since I started using the belt sander/grinder and the felt wheel I don't bother with microbevels. I'm more interested in getting a fresh edge back on the cutter and getting back to work.
I used to use the Scary Sharp system, until I started teaching high school shop. That's when I started using the Lee Valley belt grinder. I needed a way to sharpen a lot of butt and lathe chisels and plane irons in a hurry and still do a decent job, and I didn't want to mess around with the bother and expense of the wet grinders or the new high tech sharpeninging systems. It works very well for me.
If you really want to stay Neander, but still be efficient, then get a hand cranked grinder, or better yet, two. Put a soft white grinding wheel on one, and a hard felt wheel on the other one. Hand grinders are still easy to find on auction sites or in secondhand and antique stores. I got one for $5 at an antique store, stripped it down, sandblasted it and repainted it Coleman Lantern green; it looks great bolted to a shelf.
Member
I prefer a method that:
A. Gets to the desired bevel angle as easily (quickly) as possible.
B. Achieves (A) with the minimum lost of blade material.
C. Result is accurate.
D. Cost is justifiable.
My experience leads me to the conclusion that 80 grit paper, preferably a power sanding belt cut and glued to a flat surface, achieves my goals without spending $400 for a Tormek, or $100 for a diamond plate. At this point, I move to water stones for a microbeveled cutting edge. Power grinders of any kind remove a lot of material over time, unless you are able to achieve a perfect setup every time before putting wheel to blade.
 Posting Permissions

 Reply With Quote