The blums are double what the forst ones were. I like blums too. I need 18 prs though.Originally Posted by Yoshikuni Masato


 [OP]
Member
[OP]
Member
The blums are double what the forst ones were. I like blums too. I need 18 prs though.
Member
I make my beading stock alittle less than 3/8" and it looks right- plus, all the top kitchen manufacturers are using the same profile so it must be right or totally wrong. My bit is Freud but I dont know which.
joint-route-rip-joint-route-rip........
Strive for perfection...Settle for completion
Guest
That's a "Wood Mode" cabinet door isn't it?
They use a profile bead cutter and assemble it sort of like an old style colonial door frame with the beading. The beads end up aligning in the corners.
Bear in mind that they also apply a glazing to the finish to highlite the textures.
I think it's sprayed wiped on after the first coat of finish and wiped off really well by hand. The dark color gets in the recesses of the finish and the molding making everything look a touch more dramatic.
[OP]
Member
Its here http://www.kitchenplace.com/FEimages...or/roanoke.jpg
Member
Craig,
I have to agree with our new friend "David DeSotomoto". Milling the the bead into the face frame is the coolest way to go... Does not take that much more time, and it just feels a little more high end.
We just did our kitchen with the beaded face frame, and love it. I'll add another option to the two options that Hiroshima Dave offered on the hinges... I too am a blum man and used the 71T5580(inserta) or 71T5550(screw-in) and the 175H190_H9 mounting plate.... BUT instead of building out the cabinet at the hing point, I shrink up the box to be flush with the face frame wich looks real clean. This works well if you have lots of exposed cabinet sides that you plan on using decorative sides on. It allows you to finish the full cabinet side with a solid panel/door so each piece looks like furniture instead of tacked on doors.
In order to eliminate some of the 'hand work' of doing the face frame work... a jig and mortice machine set to 45 degrees can save alot of time.
Just my worthless 2 pennies.
[OP]
Member
So if you have two boxes that meet. There might be a decent sized gap in between then that you never see because its behind the framework. Is that correct. Thus letting you bring the face fram to edge of box but not lose the width of astetics.
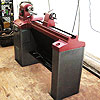
This is just a built in about 7.5 tall and 12 feet wide. It doesnt have open shelves and more up top or granite but everything else is the same.
I will take a look t-morrow at the explanation by yoshiku namamachi on the beaded frame again.
resize.JPG
Member
................correct, it in fact wastes an inch of cabinets space... but the payoff is, ease of build, and a clean appearance inside the cabinet.
Member
Considering your question about the raised panel tongue I think you may be seeing this wrong. Typically on a door with applied molding (bolection) most of the body of that molding rides on the rails and styles. The molding by design projects above the plane of the rest of the door when viewed from the side. A rabbit is milled into the back side of the molding and only a small portion of the inside edge intersects with the panel, so no giant tongue (flat) is necessary. Also the exact location of the molding/tongue intersection is usually set by the depth of the rabbit on the back of the bolection eliminating the necessity for a very deep panel tongue.
I hope that's not too confusing. Maybe someone has a good sketch they can post as I am unable to upload the picture in my minds eye.
You may also see mitered door frames which allow an inside molding which appears flush with the rails/styles, and in this case the groove is contained in this molding as it is integral with the style/rail stock.
Guest
Yah that's a scarf joint. I'm pretty sure that's what it's called. You can get the same result with applied beading.
It's really just a question of which cow you are in the mood to milk.
[OP]
Member
No I understand now.Someone did put a sketch on here like that. I think it was nakimichi (sp) AKA david. Thank you for explaining more.
I would like to 45 the stiles and rails , the doors are inset. Its alot easier to square up butt joints than 45s for inset doors.If they were overlays I would miter them.I m swayed neither way as of now.
Member
I was just wondering ... would it be possible to use a hollow chisel mortiser to cut the majority of the notched portion from the style as you have it in your picture? This would only leave the two outside 45's to contend with. I apologize if this has already been mentioned but there is a lot of infomation in this thread and it is starting to run together in my head.
Dave
aka The Putz
 Member
"...would it be possible to use a hollow chisel mortiser to cut the majority of the notched portion..."
Yes...possible. Not the "best" way perhaps but possible.
Bagwan Rasneesh
 Posting Permissions

 Reply With Quote