My plans for the Morris Chair arms call for them to be 1 1/2" Thick. Is that not a little over kill ? Don't know if I'll be able to move the thing. Thanks.


 Member
My plans for the Morris Chair arms call for them to be 1 1/2" Thick. Is that not a little over kill ? Don't know if I'll be able to move the thing. Thanks.
 Member
Looks like the chair and otto are coming along Ben.
Can't say much on the cushions as mine are not done yet...
The bottoms of my chair and otto legs have a small chamfer on them.
I just knocked off 1/8" on my router table, but one could use a block plane to achieve the same result.
Brian
The plans from wood mag called for our bowed arms to be 3 pieces of 3/8" stock cold bent on a form.
As I prepared the stock for my arms I left them just a hair proud of 3/8".
This gave me a final thickness of just under 1 1/4".
To me the proportions are fine.
Any larger they may look a bit clunky, but thats just me...
Member
Thanks Gary thats what I thought,I just wasn't sure. 1/14 it is then.
Last edited by Brian William; 10-29-2009 at 8:07 PM.
 [OP]
Contributor
[OP]
Contributor
Thanks for sharing Ben,Originally Posted by Ben Martin

The pic of the stretched bow-arm Morris is very cool!
My first time to see anything like that,
and I'm glad I did...
somebody ought to make one of these beauties.
I'd love to play with it, but for now my plate is pretty full.
Any volunteers?
hehe
Walt
There are no shortcuts to anywhere worth going! WCC
Be who you are and say what you feel, because those who mind don't matter and those who matter don't mind - Dr. Seuss
Crohn's takes guts. WCC
[OP]
Contributor
Hi Jim,
I am not familiar with any specifics, but I'm sure classes are available.
In case you missed it, this build was a first chair for Gary, Nathan and myself.
Everyone brings different skills and experience to a project,
and everyone runs their own race.
We had built other furniture, which surely helps.
But, that having been said, the plans included enough instructions to
assist all three of us to finished chairs.
I can surely see the benefit of a class, just mentioning that
it is also possible to build a chair without being formally taught.
I find the lessons I stumble through on my own carry the most value.
I try, I stumble, I learn, I carry on.
Rinse, lather, repeat.
We're here for you, if you decide to tackle a chair.
be well,
Walt
There are no shortcuts to anywhere worth going! WCC
Be who you are and say what you feel, because those who mind don't matter and those who matter don't mind - Dr. Seuss
Crohn's takes guts. WCC
 Member
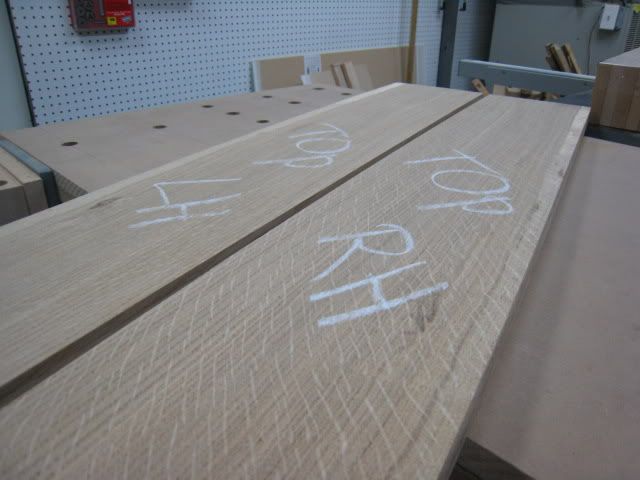
Well, moving right along, after a bad bout with planer snipe tonight, I got the pieces for the arms ready to go. I would have had one glued up tonight, but after calling 30 stores in the area, I lucked out. I guess the 31st call was the charm because I finally found some.
To fix my planer snipe I simply double stick taped (on the far end) each lamination to a piece of 3/4" ply and was off to the races.
Man, I can't wait to get some finish on these things, I really like the grain pattern, they are book matched also!
 Member
Hey guys, I am back. The chair is still i/p and in transit to my new house in Washington. Stand by for the new shop assembly and then back to work!
Dewey
"Everything is better with Inlay or Marquetry!"
Member
Well I have all the lumber dimensioned and ready to go. But I'm wondering on the construction of the main chair legs. What is the concenses as to a solid leg or the 4 piece contstruction. To me the solid leg would seem stonger and easier to do. Thanks.
Member
Brian
With the four piece legs we have a quarter sawn look on all sides.
This is the effect we were looking for.
The one piece would be a lot easier to do but not look as good IMHO.
[OP]
Contributor
Hi Brian,
Here is a link to a thread I did about various Arts & Craft leg options:
http://www.sawmillcreek.org/showthread.php?t=86109
Here is a fancier but fussier 4 pc discrete leg I added to my leg photo essay:
http://www.sawmillcreek.org/showthread.php?t=89240
I am unsure of your experience, so I'll boil it down.
Although cherry was also used by builders of the A&C style,
oak was the quintessential, main wood of choice.
The two main colours of the oak family are white and red.
Many different trees fall (punny, sorry) under these headings.
The other key aspect when trying to reproduce authentic A&C furniture
is the method of sawing the logs.
Sawmills run it through three different ways.
Least expensive and most common is plain or flatsawing.
This shows many 'V' arches, often referred to as cathedrals on the faces.
Next we have rift sawn, where the end grain runs around 45 degrees.
The board faces will show straight, straight grain.
No medullary rays will be visible on the faces.
This is a strong choice for legs, because the straight, straight grain tends
to appear (with careful stock selection and placement) consistent on all 4 sides.
Then we have quartersawn logs. (the QS abbreviation is often asked about in forums)
The cross-section of the log is sliced like a bird's-eye view of a pie with
only 4 pieces. (but birdseye is flecked maple, and another story!)
These quartered logs are then sawn into boards, with every cut taken from
the bark toward the pointy center.
The end grain runs around 90 degrees. (there are grading rules for such)
The lumber will prove more stable over decades of seasonal movement,
and the faces show medullary rays where the tree moved sap.
Straight, straight grain on the faces and wild ray fleck, or flake, running
all over make these attractive boards as desirable now as they were back then.
The downside to QS oak, is you get what are considered a pair of handsome sides, and a pair of ugly painsawn sides.
This eventually led to approaches to make 4 sided legs which looked consistent and attractive on all sides.
In answer to your question, yes a single piece leg would be easier to build.
But the most you can get will be a pair of QS faces, with a pair of plainsawn faces.
Personal choice if that will be acceptable to the individual.
While there can be issues with applied veneer faces working loose over time,
I do not feel the leg strength is compromised by these approaches.
A quick way to try to determine if a board is white or red oak,
is to look at the end grain. White oak is denser and thus heavier,
and the pores will be closed.
Red oak will show open pin holes in the end grain.
They say you can blow bubbles in a glass of water through up to a 10" piece of red oak.
Another distinction between white and red oak is the frequency and nature of the rays.
Quartersawn white oak will show wider and more frequent rays.
Quartersawn red oak will show narrower and less frequent in general ray fleck.
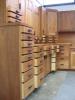
Here is a set of 20 QSW oak half-cores, along with a pair of test cores from a 2x4 scrap.
This is enough to make test cuts, and whole cores for 5 legs.
The worst of the legs will be used as a layout story stick, and to set up test cuts for mortises.
Just a little insurance with this tricky construction. Any gaps would be glaring and nasty.
leg-half-cores.jpg
Gonna be sexy legs!
Some builders want to use the authentic QSW oak, and on all 4 sides of a leg.
A nifty trick for one piece A&C legs is to use carefully chosen rift sawn oak.
While you get no ray flake, you do get straight grain, and all sides can look the same.
Dab hands do not necessarily want wild rays on every inch of a piece of furniture.
Rather they will pick and choose the grain to highlight this,
while muting that... to achieve a harmonious overall appearance.
Only you can decide the correct path for yourself.
Good luck with it,
and be sure to share a peek, with the Creek!
Walt
Last edited by Walt Caza; 11-01-2009 at 9:14 AM. Reason: added a pic of cores after 4 cuts
There are no shortcuts to anywhere worth going! WCC
Be who you are and say what you feel, because those who mind don't matter and those who matter don't mind - Dr. Seuss
Crohn's takes guts. WCC
Member
Thank you for the relpy on the legs ,great information. Well I have another question for you. Ok, the back rest slats are bowed,with a tennon on each end that goes in to a mortise on the back rest verticle side rails. In other words an angled tennon. What is the best way to cut these. Before or after the curve in the slats are established. This may seem a silly question but I just don't want to make a mistake and waste my wood. Here's another one for you. In the cutting and milling demensions that are provided in the assembly manual do not match the demensions on the actual plans. Yet some do. So you really have to pay close attention this as it's very easy to make a mistake. I dunno there doesn't seem to be any real connection between the two. The plans I'm using are from American Furniture Design. Sorry for the questions,probably drivng you crazy.
Member
Brian,
The easiest way to cut the back slats for that chair (it is the same one I am building) is to start with 8/4 material and mill it to 1 3/4" thick, then cut the curve on the bandsaw, clean up with a OSS. The tenons can then be cut before shaping them, makes it much easier. I am not sure what you mean by the tenons being at an angle, if you cut them this way they aren't. This is the same step that I am on now also, I just rough dimensioned the lumber yesterday.
Did you read the FWW article on this chair? Also, there is a video series on their site also, definitely worth watching. I haven't even looked at the instructions to get any dimensions, all of mine have came right from the drawing and the FWW article, I have yet to find a discrepancy (although the article mostly lists rough dimensions).
Member
Thanks for the information Ben. I had a look at the FWW videos. As you said well worth watching. read the article to. Thanks for the heads up.
Member
No problem, let me know if you have any other questions. I got the tenons on the slats, made my template and just need to bandsaw and OSS them smooth. Which leads me to my problem, no OSS, ohh well, I think the local HD will get some business from me, looking at the Ridgid OSS/Belt Sander.
Projects will have to wait over the weekend though, going on a 5-day cruise to Mexico!!!!
Member
Hi Ben, well I have all the parts cut and deminsioned and ready for the joinery. Spent the evening building the bending form for the arms. Slats are done. Just have joint the legs tomorrow,then it's on to the fun stuff. Thanks for the heads up on that FWW video. After watching that it seems straight forward. Guess the tricky part will be the arms. Heres a little hint for you on the slats. I kept the husks from the slats. Then double sided taped one of the husks on to the slat. Then finished the opposite side up on the OSS. Then did the other side the same way. It keeps the side of the slat your sanding verticle to the sanding drum. Worked like a charm. Just remember to number them when you cut them out.
Last edited by Brian William; 11-04-2009 at 1:35 AM.
 Posting Permissions

 Reply With Quote