Results 1 to 13 of 13

Thread: Installing a Bench Dog 40-031 ProMax Cast Iron Router Table Extension on a Cabinet

  1. #1
    Join Date
    Nov 2004
    Location
    Staunton, Virginia
    Posts
    379

    Installing a Bench Dog 40-031 ProMax Cast Iron Router Table Extension on a Cabinet

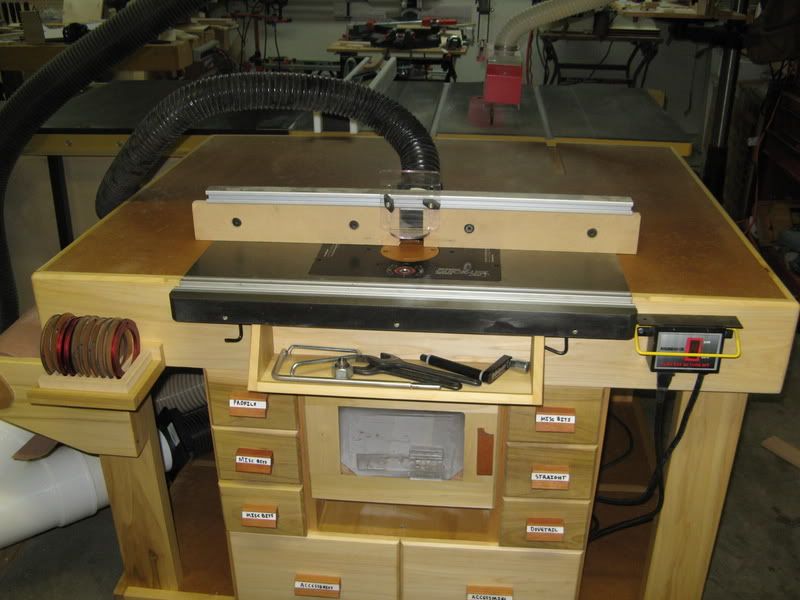
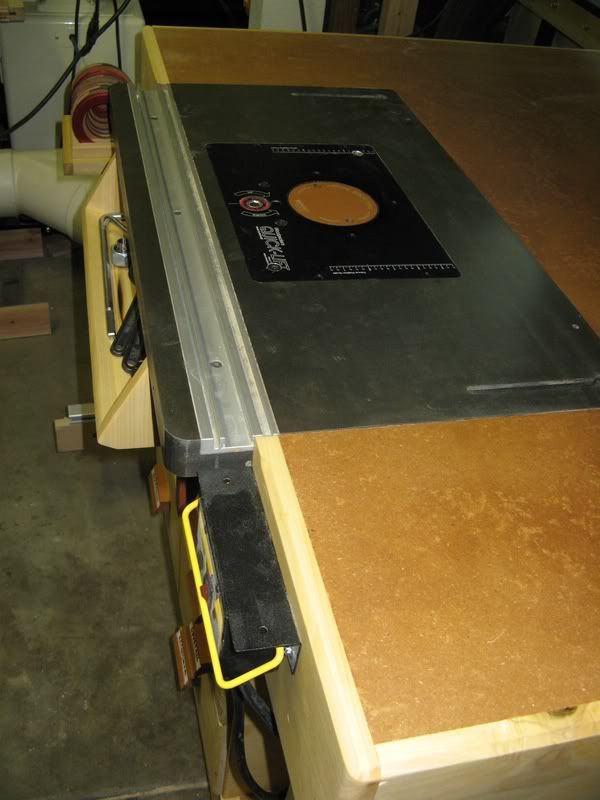
    In what seems to be my never-ending quest for an absolutely flat, never-sag router table top, I recently came across the Bench Dog ProMax Cast Iron Router Table Extension that I have seen pictured attached to a base cabinet (not installed into the TS as an extension).

    I was able to find the owner’s manual for this product, but after looking through it, I could see no instructions for how to attach it to any thing except a table saw. The pictures in the manual seem to suggest that there may be a pair of counter-sunk holes in the top (along the back-side) but I could not see any attachment points at the front.

    Has anyone installed this top in a cabinet and if so how did you attach it?

    Thanks,
    Rick
    I'm only responsible for what I say, not for how it is understood

  2. #2
    Join Date
    Feb 2008
    Location
    Stanwood, WA
    Posts
    3,059
    Rick,
    It seems that you are going to have to fabricate a piece of metal for the wing to mount to (like a table saw has). Heavy duty angle iron comes to mind.

    Sounds like a good idea and I am sure it will be plenty heavy and flat. Let us know how it works out.

    Dewey
    Dewey

    "Everything is better with Inlay or Marquetry!"


  3. #3
    Join Date
    Nov 2004
    Location
    Staunton, Virginia
    Posts
    379
    Quote Originally Posted by Dewey Torres View Post
    Rick,
    It seems that you are going to have to fabricate a piece of metal for the wing to mount to (like a table saw has). Heavy duty angle iron comes to mind.
    Dewey
    I was thinking along those lines too, Dewey. I looked a little more closely at the Bench Dog manual and I see that there is something called an "end-cap" that presumably addresses this need. Of course the cost seems a little steep ($89.00) if I could accomplish the same thing with angle iron.

    Rick
    Attached Images Attached Images
    I'm only responsible for what I say, not for how it is understood

  4. #4
    Join Date
    Sep 2005
    Location
    Sacramento California
    Posts
    332
    I did this


    The two holes along the back are used to attach it to a TS and can be used to attach it to a cabinet as well. However I just routed out the recess by laying the top onto the cabinet, then marking the outline with a pencil and then using a jigsaw to remove the bulk of the waste. I then re clamped the boards as guides along the sides of the top. Removed the top and used a template bit to clean up the recess. After that the fit was so tight that I did not need to use screw or bolts to attach the top. I just slid it in and let the pressure hold it. Works great.

  5. #5
    If the Bench Dog table is installed on a Bench Dog stand the End Cap is used and there are four L brackets that attach to the bottom of the table and then are bolted through the front of the Bench Dog cabinet.

    If you download the instructions from the BD website you can see how it's done in the BD setup. If I recall correctly it's covered in the stand instructions as well as the end cap instructions but you might want to download the table, end cap, and cabinet instructions just to make sure you get the one that covers it.

    Michael

  6. #6
    Join Date
    Mar 2003
    Location
    SE PA - Central Bucks County
    Posts
    65,983
    Please see my thread detailing my cabinet based solution: http://www.sawmillcreek.org/showthre...ighlight=Bench I used the existing bolt holes to fasten to my cabinet. I also did utilize the 4" end cap for both the increased width and for the eased corners. I wanted to be able to use the setup from either side.
    --

    The most expensive tool is the one you buy "cheaply" and often...

  7. #7
    Join Date
    Nov 2004
    Location
    Staunton, Virginia
    Posts
    379
    Thanks Michael and Jim for the OUTSTANDING pictures. What I have in mind will probably not be anywhere near as elegant as what both of you have done.

    I have a question for Jim: I am curious about whether there are tapped holes in the places I circled on the attached enlargement of your picture. If so, it looks like I could make a "down and dirty" base cabinet and just run some bolts into those holes to secure the top.

    Thanks,
    Rick
    Attached Images Attached Images
    I'm only responsible for what I say, not for how it is understood

  8. #8
    Join Date
    May 2005
    Location
    On Canada
    Posts
    136
    Rick another Bench dog on a homemade stand . Took the router table off my table saw after installing a Jessem Mast-R-slide in its place.
    Attached Images Attached Images

  9. #9
    Join Date
    Mar 2003
    Location
    SE PA - Central Bucks County
    Posts
    65,983
    The holes were tapped on my top...if I recall, they are normal 1/4" bolts.
    --

    The most expensive tool is the one you buy "cheaply" and often...

  10. #10
    Join Date
    Jul 2007
    Location
    Forest Grove, OR
    Posts
    1,167
    You could probably get a used cast iron extension wing from a Unisaw to mount to the back of the bench dog if you wanted more depth to the table in cast iron, instead of their little 4" one.

  11. #11
    Join Date
    Jan 2008
    Location
    Columbus, Ohio
    Posts
    60
    I know that this is an older thread, but I have a question for those who have the Bench Dog router table mounted on their saw. Have any of you fitted a box below the table encasing the router? It would then be like a cabinet mounted router which helps with dust control under the router table and keeps sound muffled. That's the only thing keeping me from purchasing the BD table saw router extension. Any other issues with that set-up?
    Thanks, Kevin

  12. #12
    Join Date
    Mar 2003
    Location
    SE PA - Central Bucks County
    Posts
    65,983
    Kevin, you should be able to suspend a box using the same mounting holes used for attaching to a cabinet.

    See the photos ...here. There are bolt holes on the bottom of the top, so you just need to keep that in mind as you build your cabinet structure. I show this in the very first post of the thread I reference.
    --

    The most expensive tool is the one you buy "cheaply" and often...

  13. #13
    Join Date
    Jul 2007
    Location
    NE Oklahoma
    Posts
    391
    Quote Originally Posted by Kevin Fitzsimons View Post
    I know that this is an older thread, but I have a question for those who have the Bench Dog router table mounted on their saw. Have any of you fitted a box below the table encasing the router? It would then be like a cabinet mounted router which helps with dust control under the router table and keeps sound muffled. That's the only thing keeping me from purchasing the BD table saw router extension. Any other issues with that set-up?
    Thanks, Kevin
    My BD TS extension has tapped holes in bottom to attach BD dust shroud -- mine is from 2007 and not sure if current models have the tapped holes.

Similar Threads

  1. cast iron router table extension question
    By Jerome Hanby in forum General Woodworking and Power Tools
    Replies: 14
    Last Post: 05-19-2008, 9:58 AM
  2. Using Grizzly Router Table Extension
    By Edward Garrett in forum General Woodworking and Power Tools
    Replies: 1
    Last Post: 02-02-2008, 9:10 AM
  3. Table Saw Extension Wing for Router
    By Paul Dell'Anno in forum General Woodworking and Power Tools
    Replies: 9
    Last Post: 11-08-2004, 10:19 AM
  4. Router Table Quest
    By Maurice Ungaro in forum General Woodworking and Power Tools
    Replies: 15
    Last Post: 09-17-2004, 12:23 PM

Posting Permissions

  • You may not post new threads
  • You may not post replies
  • You may not post attachments
  • You may not edit your posts
  •