Results 1 to 11 of 11

Thread: photo tent trials...and errors

  1. #1
    Join Date
    May 2005
    Location
    Montreal,Quebec
    Posts
    161

    photo tent trials...and errors

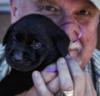
    downloaded some plans today to finally attempt a go at making a tent to take some pics..quickly learned that tents and lights are just one piece of the puzzle when it comes to taking pics like I am used to seeing here...camera is HP Photosmart 935, no macro settings that I could find, did what I could. Critiques and pointers gladly accepted, thanks for looking.
    Attached Images Attached Images
    measure, cut, shake head

  2. #2
    Join Date
    Jan 2005
    Location
    Goodland, Kansas
    Posts
    22,605
    I tell ya Ron those are some pretty good pictures. I think you did a great job. I need to do something about a photo tent but working full time, part time clock shop and trying to turn there is no time.
    Bernie

    Never put off until tomorrow what you can do the day after tomorrow.

    To succeed in life, you need three things: a wishbone, a backbone and a funnybone.


  3. #3
    Join Date
    Aug 2006
    Location
    Wimberley, Texas
    Posts
    2,828
    Pictures look good, Ron. Might want to try smaller lens opening and longer exposure to get a little more depth of field. Can use a tripod and the camera's self timer to eliminate camera shake for long exposure times.
    Richard in Wimberley

  4. #4
    Join Date
    May 2005
    Location
    Montreal,Quebec
    Posts
    161
    any idea how to look for smaller openings and exposure times in wee little words for the photo challenged? (I knew I shoulda stayed with reading comic books)
    measure, cut, shake head

  5. #5
    Join Date
    May 2005
    Location
    Montreal,Quebec
    Posts
    161
    Thanks Bernie for the kind words, the tent took me about 20 minutes and twenty bucks (already had the 6500K lights over the lathe) got the info here

    http://www.ignitecast.com/p/BpHT5mWNVq/
    measure, cut, shake head

  6. #6
    Join Date
    Feb 2008
    Location
    Buffalo, NY
    Posts
    1,733
    Thanks for the link Ron. I'll have to go to the store later and get some materials to build one.
    It’s only work if somebody makes you do it.
    A day can really slip by when you're deliberately avoiding what you're supposed to do.
    Duct tape is like the force. It has a light side, a dark side and it binds the universe together.

  7. #7
    Join Date
    Aug 2006
    Location
    Wimberley, Texas
    Posts
    2,828
    Ron,
    Will just repeat the advice I received. Read the owners' manual. Lacking a "photographic" memory, I refer to mine fairly often.
    Richard in Wimberley

  8. #8
    Join Date
    May 2005
    Location
    Montreal,Quebec
    Posts
    161
    Richard,

    I found very little info that I could use in there, but a fellow turner not too far from me downloaded the manual from the company site and he was able to give me some pointers as to what I was probably doing wrong. Will try toredo some pics today/tonite if I find the time, this intrigues me and I really want to get a handle on this part of the woodturning culture (Heck, maybe I can doctor up the pics and make the turnings look better)
    measure, cut, shake head

  9. #9
    Join Date
    Aug 2006
    Location
    Wimberley, Texas
    Posts
    2,828
    Ron,
    For "doctoring" the pics I just use a combination of the software that came with Vista and the program that came with the camera. Together they do most of what I want. Have looked at a couple of the freebee online programs that are said to be good, but seem to be unable to use them without an owners' manual.
    Richard in Wimberley

  10. #10
    Use of Aperture/F-Stop

    The aperture is one of the more confusing parts of how cameras work. The aperture setting is also sometimes referred to as an f-stop. While the shutter speed affects the duration of light hitting the sensor, the aperture affects the amount of light hitting the sensor. To put it simply, the aperture is the part of a lens that dictates how much light is let through to the sensor – if it’s wide open, lots of light gets through. If it’s closed down, not much light gets through. In essense, it performs the same as the pupil of an eye. If you are in a dark room, the pupil is open; sunlight, the pupil is small.


    Aperture settings are expressed as decimal numbers, and work opposite to the way you’d think – a higher number lets in less light than a lower number. Each aperture has an Open, and a Closed – the most and least light it will let in. In between it is what is known as the f-stops, or aperture settings – numbers like f1.6, f2.2, f8.0, f16.0, with many in between. Different lenses can
    have different apertures – for example, a cheaper lens may only open to f4.0, not letting in as much light as a more expensive lens that will open to f1.6.

    Changes to aperture will effect "Field of Depth" as well and you should refer to this tutorial as well.

    Finally, another good utilization for apature is when taking night time city scenes. Utilizing a smaller apature setting can help enhance the "star like - radiating" effect of lights, which can lead to some nice nightscape images.

    From...http://www.homephotog.com/tutorials/aperture.shtml
    Glenn Clabo
    Michigan

  11. #11
    Join Date
    May 2005
    Location
    Montreal,Quebec
    Posts
    161
    Thanks Glen, will be experimenting again in next few days, will throw all this at the bowl and watch it come to life,,, or not
    measure, cut, shake head

Posting Permissions

  • You may not post new threads
  • You may not post replies
  • You may not post attachments
  • You may not edit your posts
  •