Page 1 of 2 12 LastLast
Results 1 to 15 of 22

Thread: Spraying Target USL with Wagner Conv. Gun

  1. #1
    Join Date
    Jul 2006
    Location
    Lexington, KY
    Posts
    283

    Spraying Target USL with Wagner Conv. Gun

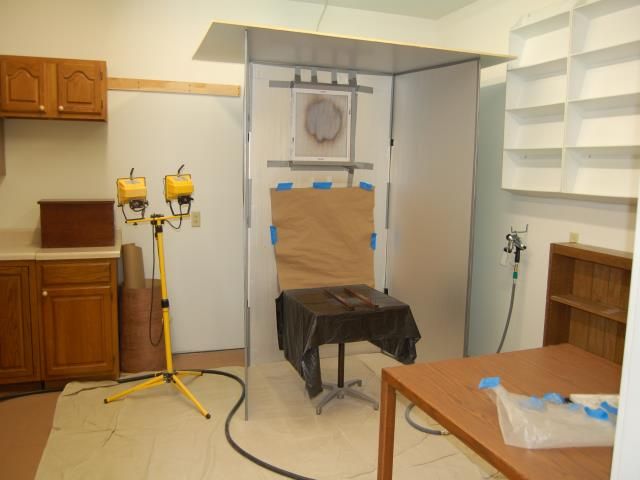
    I sprayed for the first time the other day, results were not what I expected, I don't think I was getting good atomization.

    Was wondering if anyone with a wagner gun could share their compressor, gun, and thinning steps with me.

    I realize every setup and environment is different, but at least I can start with a baseline and adjust from there. I've never sprayed before and have no clue what a good spray setup looks like on the wood.

    I had 45lb at compressor and 15 on the gun. I didn't thin the finish at all (i'm in 70 degree basement, humidity not too bad). When I sprayed, the gun pressure would drop to zero, which I think in hindsight is a sign that I wasn't getting good atomization. I also had to unscrew the fluid knob quite a few turns to get product flow.

    Does anyone have any settings they can get me started with, and how much if any did you thin the USL?

    Thanks for your help!

  2. #2
    Join Date
    Oct 2007
    Location
    L.I., NY
    Posts
    157
    Chris-

    I don't use that gun but set the regulator pressure at the gun with the trigger slightly depressed (releasing air but not finish). Set the regulator to slightly above the maximum inlet pressure to account for the hose-pressure drop.
    Matt

  3. #3
    Join Date
    Oct 2007
    Location
    L.I., NY
    Posts
    157
    Quote Originally Posted by Chris Merriam View Post
    ...how much if any did you thin the USL?

    Thanks for your help!
    That shouldn't be necessary.
    Matt

  4. #4
    Join Date
    Jul 2006
    Location
    Lexington, KY
    Posts
    283
    Oh! I never knew when people gave their gun pressures that they were shooting air through them!

    Thanks for the tip, I'm going to go check and see how far off I am. Don't get my next batch of finish until friday so can't try spraying yet.

  5. #5
    Join Date
    Aug 2005
    Location
    Glenmoore, PA
    Posts
    2,194
    Quote Originally Posted by Chris Merriam View Post
    Don't get my next batch of finish until friday so can't try spraying yet.
    Could try fiddling with the gun shooting only water (not onto your piece obviously) to get the hang of it - great practice I have found. A lot cheaper as well.

  6. #6
    Join Date
    Jul 2006
    Location
    Lexington, KY
    Posts
    283
    True, I've played a bit with water but not as much as I should have. My biggest concern was water won't teach me how to set the gun up for good atomization, but now that I think about it, maybe it CAN teach me what good atomization looks like.

    I'll work on it tomorrow evening to get ready for Friday spraying.

    Thanks!

  7. #7
    Join Date
    Feb 2003
    Location
    Frankfort KY
    Posts
    495
    Charles Neil suggests spraying cardboard with water tinted with food coloring to practice and setup your gun. Works well.
    Last edited by Mark Hulette; 08-21-2008 at 9:25 AM.
    Mark


    "Diplomacy is the art of saying "Nice doggie" until you can find a rock."
    Will Rogers

  8. #8
    Join Date
    Feb 2006
    Location
    Country Club, MO, USA
    Posts
    897
    Charles' suggestion works very well! But, depending on the source of the cardboard, the surface may not absorb either water or finish very readily.

    What I do, since larger quantity of cardboard might not be available: I bought a roll of brown packing paper at HD, and cut small squares or rectangles to just fit below the exhaust fan. I use it as a target, to adjust the gun. Then I do the final fine adjustments on the gun, also using the paper as target - as the paper is VERY absorbent, the effect of even very minor adjustments can be seen immediately (and no need to add the food coloring):


    I like the brown packing paper because one roll gives me a LOT of it. When used up, I simply throw it away, and tape up a new piece with blue carpenter's tape.


    .
    Last edited by Al Navas; 08-21-2008 at 7:57 PM. Reason: Added more details
    Al
    http://www.sawmillcreek.org/images/buttons/fotc.gif
    Sandal Woods - Fine Woodworking

  9. #9
    Join Date
    Jul 2006
    Location
    Lexington, KY
    Posts
    283
    Good idea, I went out and bought some brown paper to give it a shot tonight, and of all things, my air compressor broke!! I think the drain valve bolt sheared off or the threads are messed up or something. Keeps leaking air, going to see if I can get a hold of a new valve tomorrow around town, hate to have to order such a little part.

  10. #10
    Join Date
    Oct 2005
    Location
    ft worth tx
    Posts
    29
    put a ball valve on it

  11. #11
    Join Date
    Jul 2006
    Location
    Lexington, KY
    Posts
    283
    Ok, got a new valve today, took some practice passes on brown paper, the drips came out nice and even across the fan width when sprayed vertically.

    Then made a few practice shots on scrap plywood, did a cross hatch pattern and measured it with my new mil gauge, it was 10mils! I'm suppose to be shooting for around 2 I think.

    I backed off the fluid pressure knob and sped my arm way up, got it down to 3 or 4 mils, not sure how to get 2. Will work on further adjustments later tonight.

  12. #12
    Join Date
    Mar 2004
    Location
    Coastal Virginia
    Posts
    647
    Quote Originally Posted by Chris Merriam View Post
    had to unscrew the fluid knob quite a few turns to get product flow.
    Something is wrong... your pressure should be about 12-15 lbs with the trigger pulled. I start with 1 1/2 turns on the material flow to start. Never go over 2 turns. Be sure to use a quality regulator at the gun.

    Mike

  13. #13
    Join Date
    Mar 2003
    Location
    SE PA - Central Bucks County
    Posts
    65,923
    Quote Originally Posted by M Toupin View Post
    I start with 1 1/2 turns on the material flow to start. Never go over 2 turns.
    Same here...I also start with 1.5 turns and that works well for both USL and SealCoat.
    --

    The most expensive tool is the one you buy "cheaply" and often...

  14. #14
    Join Date
    Jul 2006
    Location
    Lexington, KY
    Posts
    283
    Thanks, I will work with the fluid knob the next time I'm ready to spray, which will be after I sand off the damage I've done.

    I've got white cloudy spots all over the place. Read in one of my books if you put WB on too heavy it can do that. So I'm going to sand it all bare and start over again. Was hoping they would disappear in time, but it's been days now. Not looking forward to getting all the mahogany pores clear.

    Also, was spraying satin, and think based on some reading that it is better to go with gloss and set the glossiness at the end based on your "finishing" the finish routine. So, I've got a gallon of gloss USL on order now.

    Just to clarify on the air settings, so when people say xx at the compressor and yy at the gun, those are with the trigger depressed? I've been going with no trigger, 45 at the compressor and 15 on the gun. It dropped to 5 on the gun with trigger pulled all the way.

    Thanks!

  15. #15
    Join Date
    Jul 2006
    Location
    Lexington, KY
    Posts
    283
    Thought I might resurrect my old thread with an update:

    Seeing as how I ignored all the advice about doing a full finishing routine mockup on practice wood, I spent this past week sending my project parts down and getting ready to start the finish over again.

    One of my early problems was poor atomization. I tried cranking up the regulator on the gun, but could only get up to 5 psi with the trigger pulled. That sounded wrong and got me to thinking - I probably wasn't getting good flow to the gun. (I have a 25 gallon compressor, shouldn't have a flow problem most likely).

    I had been running my setup on 1/4 fittings. I had actually bought all the 3/8 fittings and lines but hadn't bothered changing over. So, I went ahead and changed them out. I also had a little 1/4 air filter, which after reading the specs is what I think my problem was, the cfm on it was way too low. I bought a much larger 3/8 air cleaner instead.

    Now I'm getting 12 psi when spraying, still not the 15 most people seem to use, but much better than before.

    Resprayed an hour ago and things are looking much better, about to go check now to see how they've dried. I've given up on doing a cross hatch pattern when spraying, it is coming out way to thick. One series of passes with the grain seems to be enough for the moment.

Similar Threads

  1. Wagner HVLP Conversion Gun
    By Art Mann in forum Project Finishing
    Replies: 2
    Last Post: 10-21-2007, 10:27 AM
  2. Target USL question
    By Rob Diz in forum Project Finishing
    Replies: 3
    Last Post: 06-27-2007, 3:39 PM
  3. Newbe Target water based question
    By Roger Reynolds in forum Project Finishing
    Replies: 2
    Last Post: 02-06-2006, 4:13 PM
  4. Tried my Wagner Gun & Target USL
    By Matt Meiser in forum Project Finishing
    Replies: 24
    Last Post: 02-01-2006, 4:11 PM
  5. Spraying LATEX PAINT
    By Sammy Shuford in forum Project Finishing
    Replies: 7
    Last Post: 10-01-2005, 5:57 PM

Posting Permissions

  • You may not post new threads
  • You may not post replies
  • You may not post attachments
  • You may not edit your posts
  •