This is the beginning of a big dining table. The rough-sawn planks in front of me are over 9 feet tall, 22 to 27 wide, and 2 ½ thick. They will become the top of the table. The planks behind me will become the table base.
The first major milling operation is to face-joint and thickness-plane the planks for the top. I did it with a router bridge, and the process is detailed in the next few posts.

 Reply With Quote

")


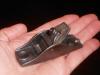
 I straight-lined the planks with a guided circular saw (the bigger Festool in this case). That was good enough to use, but I did clean up the saw marks with a jointer hand-plane.