Thanks for the additional thoughts and sage advice to practice with what's in front of me
Will post projects as they emerge for sure.
C


 Member
Thanks for the additional thoughts and sage advice to practice with what's in front of me
Will post projects as they emerge for sure.
C
"You can observe a lot just by watching."
--Yogi Berra

 [OP]
Contributor
[OP]
Contributor
Small update, but as usual the small updates are the most work. This one was tough, finished up the maple sides in prep for building the drawers. I also cut some sacrificial wear strips. This process will seem a bit unusual by comparison to the normal piston fit drawer, and for good reason, because my drawers are lipped top and bottom I must fit the sides before assembling the drawer. This was a bit of an oversight in planning on my part because thus is one scenario where modernist aesthetic makes slightly more work. Given then choice to plan again I might be enclined to show the drawer blades and make the drawers flush top and bottom.
Last edited by Brian Holcombe; 09-23-2015 at 11:48 PM.
Bumbling forward into the unknown.
[OP]
Contributor
I have been working through fine tuning my doors and installing hinges and catches as well;
The right side door needs some adjusting work before fitting catches;
left side just needs some face planing on the bottom.
Bumbling forward into the unknown.
[OP]
Contributor
Playing with dovetail layouts, So far I plan to set it about like this, so long as this layout plays well with the smaller shelves. I know many many handtoolers will prefer thinner pins, but I prefer them a little heavier for the strength of the joint. Thin pins may be just as well, especially after glue, but I like to rest assured.
Many critical tools here, the most important is the recently finished espresso.
Set the depth, I have actually set this to the thickness of the back board, but plan to use it throughout just to make life simple(r).
I overlap centerlines so that I can pick the exact center in between the lines
Taking a guesstimate at what will look nice.
Layout the angle
Choose the appropriate chisel, these chisels have sides without a land, so they're nice go-to's for sharp corners.
Showing the layout with the drawer front to give an idea of how those small shoulders will work.
I may still narrow the tails for slightly larger shoulders.
You may also notice that I am not considering where the drawer bottoms will go and that is because I have slips planned for this project. I'll layout the upper drawers and rear dovetails before cutting anything to make sure it should all workout. There are some minor inconsistencies in the drawer blades side to side, so my build will accommodate those less than perfect dimensions and do so without looking less than perfect.
Bumbling forward into the unknown.
 Contributor
Looking good Brian. It took me a moment to guess that it was the bottom drawer you are working on. You indeed have your work cut out with lips top and bottom. In your process you are showing another good example of what a tail vise can do.
Jim
[OP]
Contributor
Thanks Jim! Indeed, I'm proceeding with caution because I know it's going to be hard for me to adjust after assembly. What I will end up doing is adjusting mockup assemblies until they run smoothly before any glue is used.
I adjusted the layout a bit, rather than 1 over 7 like I had been using (8 degrees~) I went with a 10 degree angle.
The faces have had a few weeks to rest, so they're being adjusted a bit for any minor twist which has cropped up and squaring up the drawer sides. The check at this point is simple to check for out of squareness. I'm just pushing on corners to see if the face will rock.
The dovetail layout works nicely for all areas where it will be deployed. I like the pins with this slightly steeper setup, I can use the same chisel but the tops are not as thick.
Bumbling forward into the unknown.
Member
Yes, a tricky situation. I presume you'll mark to the middle and hope that everything aligns. Dry fitting is a good idea and worst case you could recut a runner a bit thicker to take up any slack...
I like the dovetail layout.
Looking good!
C
"You can observe a lot just by watching."
--Yogi Berra
[OP]
Contributor
Thanks Chris!
Marking the placing on the drawer front is pretty straightforward. If I move out the drawer side and set the face against it, I can manage to get a knife in to mark it.
I share your thoughts on the runner, if I run into any trouble. These drawer sides are super tight currently (practically a wedge fit) I set it up like that so that I have some room to maneuver once the drawer is assembled (presumably).
Last edited by Brian Holcombe; 09-26-2015 at 7:48 AM.
Bumbling forward into the unknown.
 Friend of the Creek
Brian, not unlike Liam Neeson in "Taken", you certainly have special skills. Thank you for all the time you take to document your work. You may not realize it, but even the step to "chamfer the edge to prevent blow out" was a great tip for a beginner like me. Thanks for every detail!
[OP]
Contributor
Hah, I like that comparisonMy pleasure, glad you are enjoying and find the details helpful.
Bumbling forward into the unknown.
[OP]
Contributor
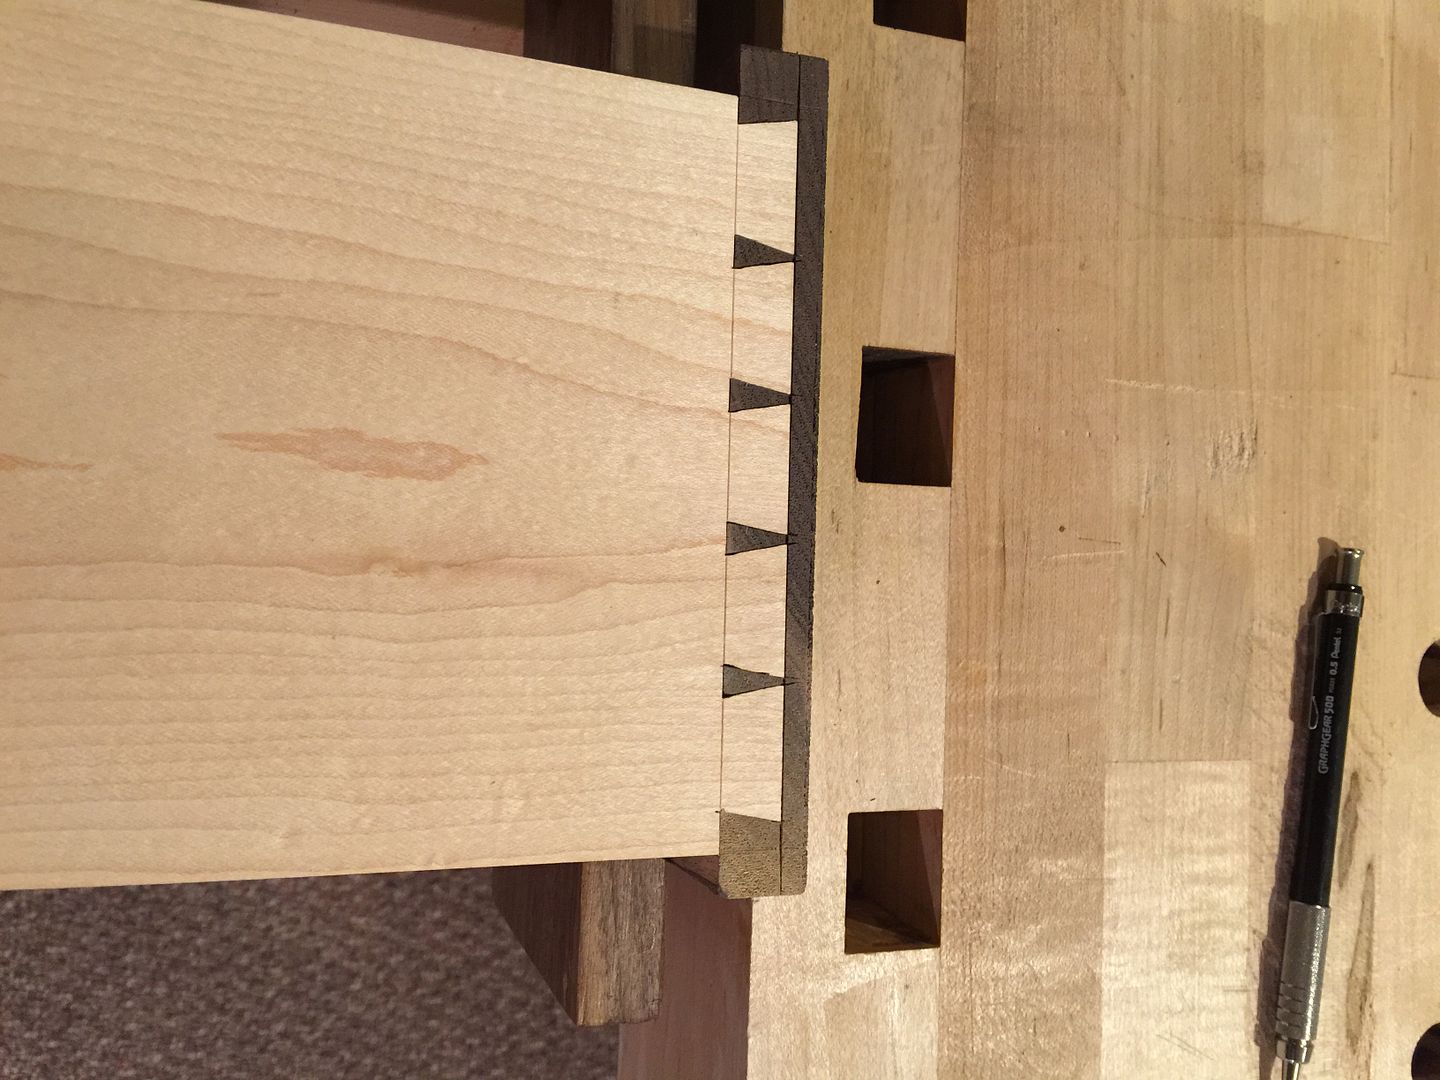
Now that the dovetails are marked out and the face is ensure to be laying flat on the ends of the sides I'm set to move forward. I cut the back to length and over-thickness (not 100% on what I'm doing for drawer slips so I left it. I cut the backs of the sides to ensure they are meeting up nicely with the backs.
Onto dovetails, I started by ganging up the sides to cut the tails
I cut the tails then split the waste with a saw
Setup with a 90 degree block
Knock out the waste with the slim chisel
Chop to the line with the full width chisel, no paring and I'm cutting straight through from the front to the inside. These drawer sides are 1/2" thick so long as I'm well registered they will not be off the line.
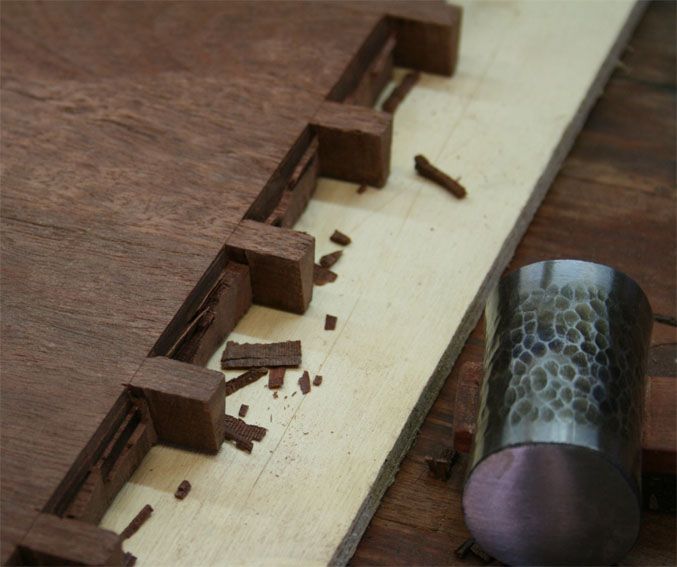
I clear the waste by tapping it back into the dt, then clearing it with a chisel (lightly)
Cut the ends
Super clean end grain, I always here about how chopping dovetails leaves nasty endgrain....not the case with this method, and this is in rock maple
Tails, just like surgery you mark the places you plan to remove

Bumbling forward into the unknown.
[OP]
Contributor
Chopping away
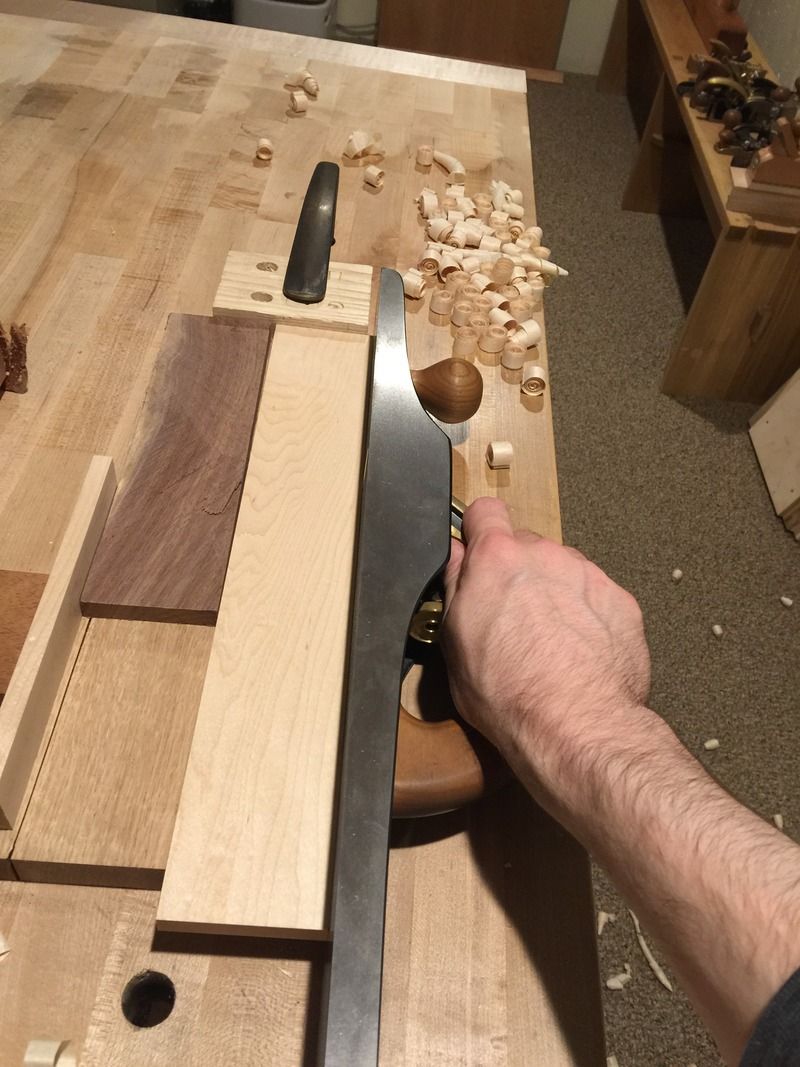
Onto the drawer fronts
Splitting the waste.....this requires me to be extra careful, though it goes quickly
Bumbling forward into the unknown.
 Contributor
Like the rest of the build, the dovetails look really nice, Brian. I like the thin, London Pattern, pins on drawers. They have an elegant look to my eye. The whole project is simple and elegant.
I've been working a lot in pine. Even in pine it's possible to get clean end grain when chopping dovetails. I'm no expert but I think it's mostly a matter of good patient technique and truly sharp chisels. I can't wait to get back to hardwood for the next project
-- Dan Rode
"We are what we repeatedly do. Excellence, then, is not an act, but a habit." - Aristotle
Member
Wow that looks great! I can only wish my dovetails looked that perfect!
 Contributor
Hi Brian
The cabinet is progressing really well.
May I offer some advice on the dovetails? In particular, about using a fence to chop to the baselines and also to get the floors flat/perpendicular. What you do seems a lot of extra and unnecessary work - and it is not accurate as well! (The photos show that you still crept over the baseline).
All you need to do is undercut the baseline. This may be done before sawing out the waste, or after that step. In the following photos I undercut after sawing the waste ..
If is then much easier to avoid shifting the baseline backward.
Article: http://www.inthewoodshop.com/Furnitu...Baselines.html
The other factor is to place the boards side on so that you can see the (vertical) angle of the chisel ...
A slight undercut is best. The baseline has no structural strength, so does not need to be flat. I just must not have a peak.
Hope that I am not telling you how to suck eggs.
Regards from Perth
Derek
Last edited by Derek Cohen; 10-01-2015 at 2:06 AM.
 Posting Permissions

 Reply With Quote