

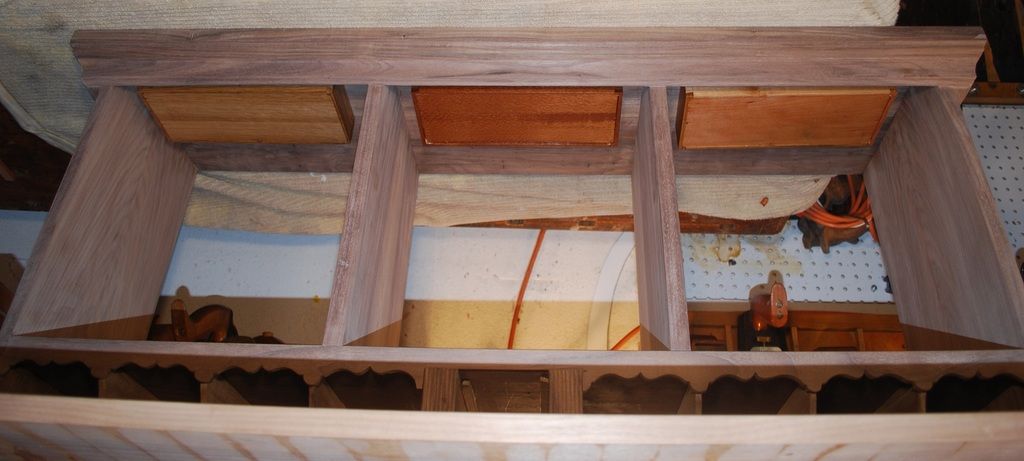
I made 3 hidden drawers that fit on the underside of the bookcase top hidden behind the cornice molding. White oak, cherry and lace wood.


 [OP]
Member
[OP]
Member
I made 3 hidden drawers that fit on the underside of the bookcase top hidden behind the cornice molding. White oak, cherry and lace wood.
[OP]
Member
I used a complex molding plane to create an OG molding transitioning the bookshelf to tabletop. IMHO, this kind of complete molding plane is a great way to get started with shooting your own molding. A little easier than hollows and rounds.
Used a beading tool to scrape a couple beads on the top edge of the molding – probably too much, but it’s a superfund tool to use. Somehow the end grain of the molding didn’t look right and a full width, mitered molding for the front also look out of place so I added ¼ inch thick facer to cover the end grain.
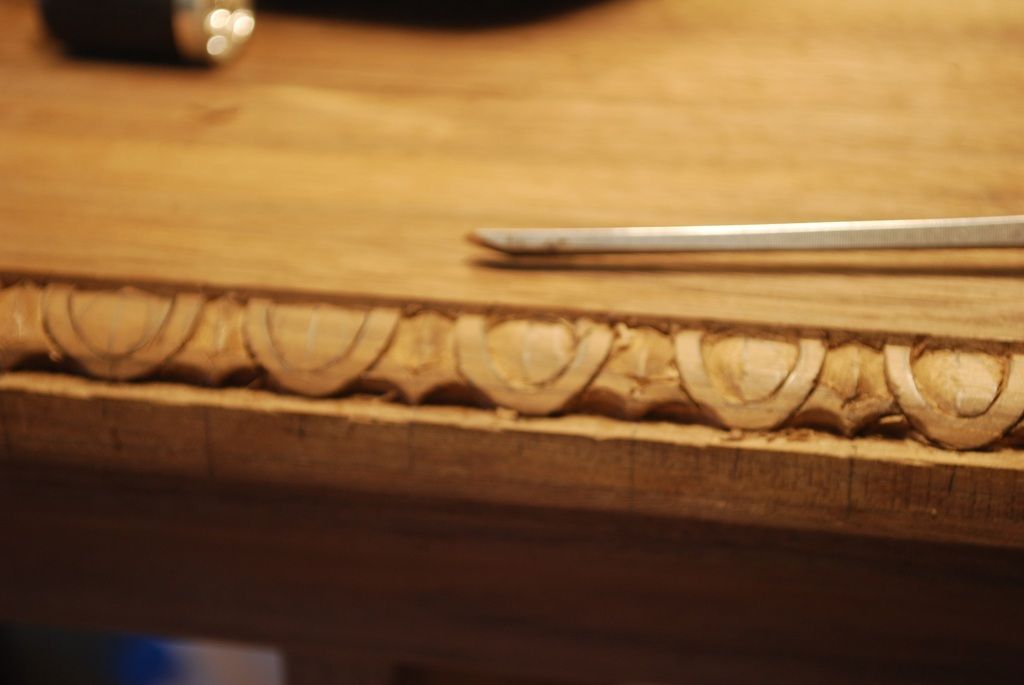
I decided to try and “Egg and Dart” carved molding for the top of the bookcase in hopes of “lightning” the visual weight of the top. “Carving Architectural Detail in Wood” by Frederick Wilber is a great reference with lots of different molding designs.
I spent way too much time trying to photocopy/resize a picture to use as a template and ended up just laying out the broad dimensions of the components with a circle template and ruler and freehand drawing in the curves for the “basket” that surrounds the “egg”.
Outlined with #’s 6 and 7 gouges and used a bench chisel to remove the chip.
Shaping the sloping top of the “dart” with a ¼” flat chisel.
Using a small, # 3 gouge to create the “egg”. Sorry for the blurry picture.
[OP]
Member
I started on the side so my mistakes would be less visible not realizing carving in the end grain is a lot harder than carving the long grain, front edge.
In total it took me about 15 hours to carved the molding. I definitely gotten faster towards the end - incising/carving the gross features went fairly quickly, but I spend an inordinate amount of time with a riffler and Ex-acto knife trying to clean up margins and remaining fragments. Im sure if I were better Carver that last step wouldnt be necessary.
I think it turned out okay.
Heres a couple pictures with the doors sitting in the case
Im glad the tedious carving is behind me and next will be making drawers for the bottom row of the pigeonhole unit. These will have rounded faces to match the profile of the vertical dividers.
Should I go with small brass knobs for the doors/drawers or try and turn them out of Holly to match the stringing? I very much appreciate recommendations!
All the best, Mike
Member
WOW!!!!! Outstanding!!!! That's inspiring.
 Contributor
Very nice indeed Mike.
One of my favorites for small knobs is to turn an acorn:
Rosewood Acorn.jpg
This one, made of rosewood, is on one of our kitchen cabinets. They can be made of just about any wood that will turn on a lathe.
jtk
"A pessimist sees the difficulty in every opportunity; an optimist sees the opportunity in every difficulty."
- Sir Winston Churchill (1874-1965)
Contributor
I love it - really looking good and thanks for documenting so far.
"The reward of a thing well done is having done it." - Ralph Waldo Emerson
 Contributor
Mike- that is truly inspiring work. Many thanks for sharing.
 Member
What was the difference in carving the end grain compared to the edge grain. Harder, easier?
Looks like it came out great. Not sure if I could do it in 15 hours.
Contributor
Mike,
I'd like to know the difference of end vs edge grain carving also. As far as the build goes a LOT of little details going on there with the planning, layout, cutting, fitting, carving etc. Wow great job and control of work flow.
Chet
 Contributor
Mike, your work is simply outstanding. I'm just blown away. The detail is exhausting to look at. How long did it actually take you to do?! I'd like a bit more description about the carving. How stable/strong is it - it looks to include a lot of fragile cross grain.
Regards from Perth
Derek
 Contributor
EXCELLENT Work mike!!!! Thank you....
Jerry
 Contributor
Wow Mike, really wonderful work. Following along with great interest!
Bumbling forward into the unknown.
Member
Getting better and better! And you work feverishly fast!
Contributor
Absolutely awesome, sir!
 Member
Looking really fantastic Mike. The carving does lighten the top and to me it looks like it came out great.
On the knobs, I don't think I've ever seen any turned in holly. Curious to see what you decide!
"You can observe a lot just by watching."
--Yogi Berra
 Posting Permissions


 Reply With Quote


