


Well I finally got to the point that I could get my benchtop flattened. My work on this could have been reduced had I done my glue-ups and milling of stock this spring vs over the winter as I milled the stock then brought it inside my breezeway for glue-up as it was warm enough for the glue to cure. Also, for a glue-up of this size, I wouldn't do it again without using splines for alignment. In total, I probably lost about a half inch of thickness due to it.
I have read about several methods of flatting a benchtop, while all of them work for the respective authors, I needed to do it in a fashion that I understood, was within my skill set and wouldnt hopefully require specialized tools that would see very limited use.
Earlier this spring, American Woodworker had an article featuring the creation of a coffee table using a very large live edge slab and the author flattened it with a router and some scrap stock. This is the method that I used as I am not comfortable with using winding sticks to check for twist etc.
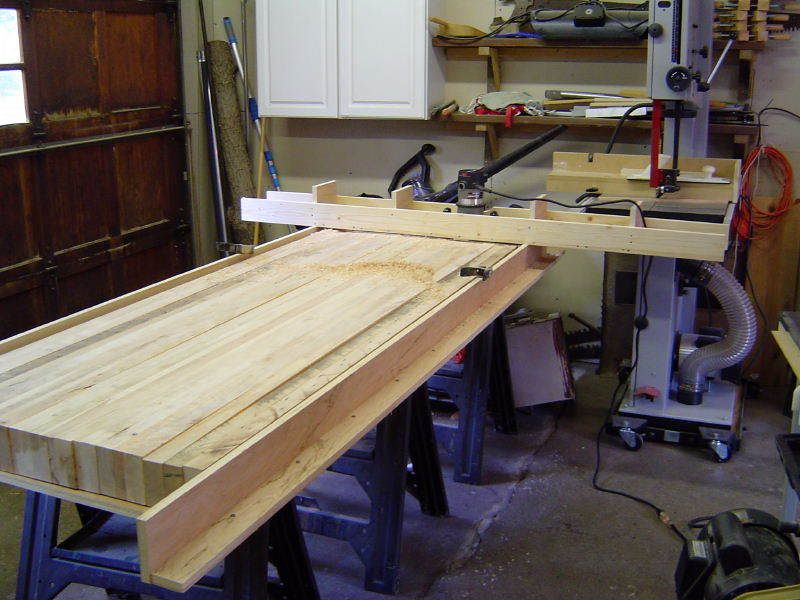
To start, I picked up a sheet of ply from HD, having them rip it to 38in wide (minimize the amount of reachover I would have to do as my top is just over 30in wide). This width also allows me to re-use the panel in making some additional garage cabinets later.
This ply serves as a "datum plane" to set up the router on.
I put this panel on sawhorses with my benchtop on top of it with my intended bottom side up to be cut first. Next, I built side rails that were the same height(width) making sure that the height was enough to allow me to have clearance to the router bit but within the adjustment range allowed by the router.
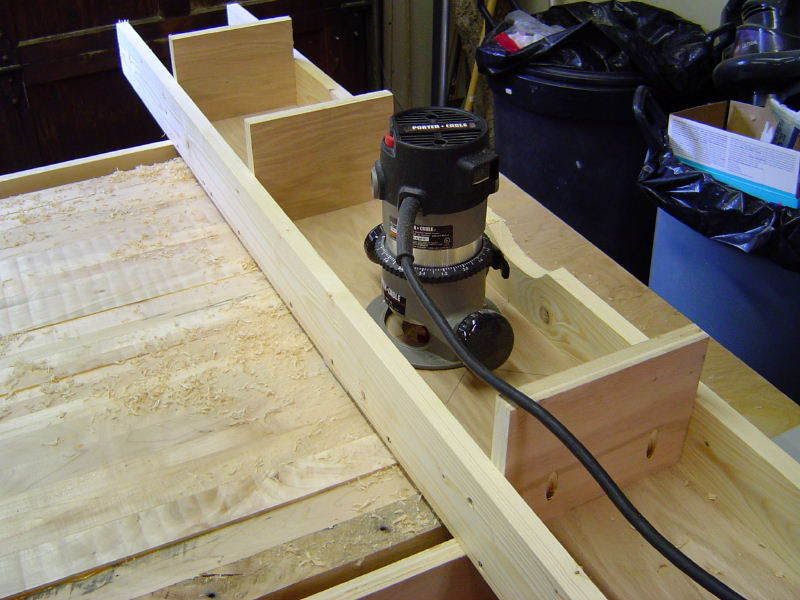
Next I built a carriage for the router out of some scrap ply and some pine that I picked up for this task. I removed the sub-base from the router and made the hole in the plywood bottom big enough that I had chip clearance and room for the collet to protrude below if needed. Length was controlled by how far I needed to move the router with each pass and still be able to have enough length to support the router on the side rails. I used a Freud dish cutting bit (94-026?) its a flat bottom cutting bit with radiused outer edges.
I used this router "assembly" to find the high spots and set my bit height based on that and donned the earmuffs, safety glasses and dust mask (use an effective one, not the typical paper masks as this WILL create a huge volume of chips and dust) and started making passes...
another view...
The first few passes were light cuts to see how well things were working, then I re-adjusted the depth of cut for a bit more aggressive of a cut. I was making side to side passes as was shown in the original magazine article but I found that in doing so I was not getting an even cut from pass to pass. The reason was two fold... 1. The side rails didnt have enough rigidity to support the pressure I was putting on them with each pass. 2. The pine I used for the sides of my carriage allowed more flex than I thought.
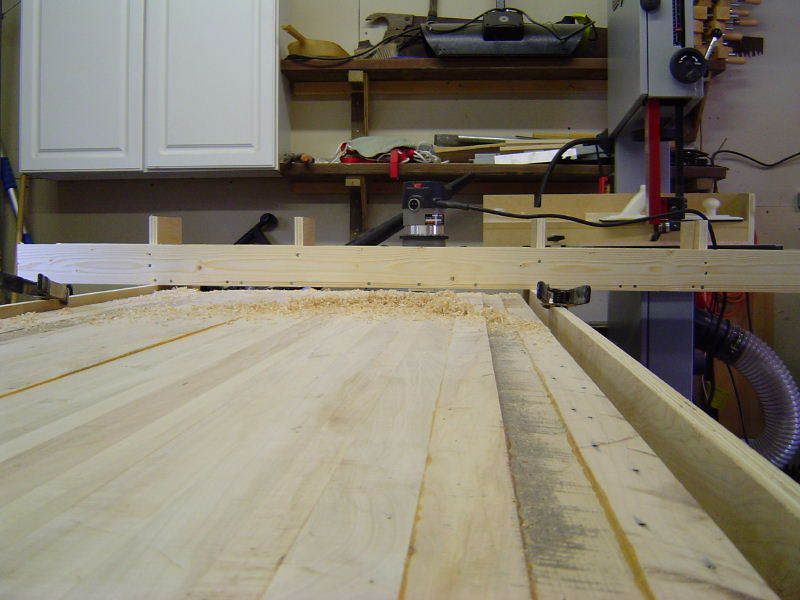
So I started going the length of the top and WHAT A CHANGE!
I was no longer fighting the router as it wasn't a crossgrain cut and I was getting near perfect consistancy from pass to pass. The only problem I had at this point was if I left the router still for too long at any one spot, I would start to get a circular burn mark from the bit!
These last two picts are tward the end of the flattening of the bottom...
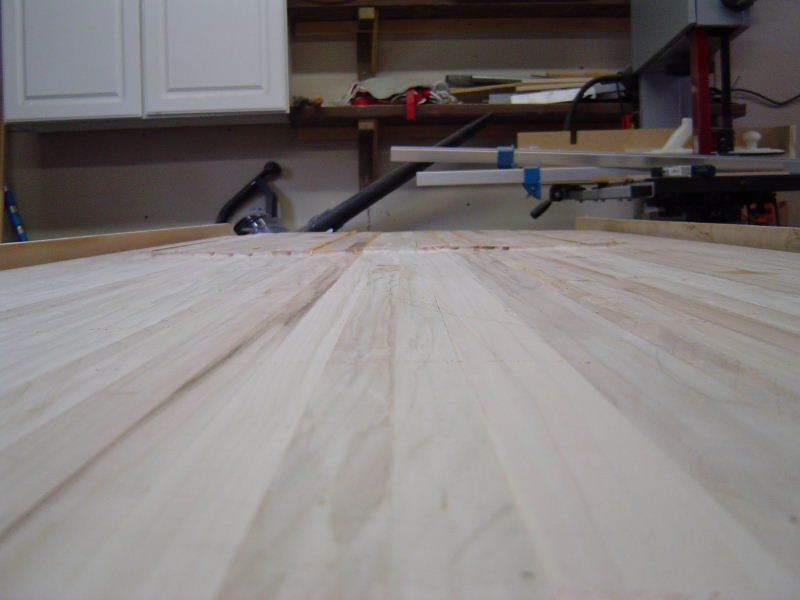
Once I had finished the bottom, flipped the panel and flattened the top. All I had to do was spend about 10-15 min with the ROS to clean up a few swirl marks and burns and the top is completely flattened.
Lessons learned? Increase the rigidity of the carriage assy by using thicker/ stronger material... Ply perhaps or a double thickness of it. Use splines in the glue up to reduce alignment errors. Mill and glue stock in the same ambient temperature to minimize movement.
Next to be done, get a good circular saw blade and trim the ends of the top and make the breadboard ends and apron along with some careful layout of the location of the emmert


 Reply With Quote