Page 1 of 2 12 LastLast
Results 1 to 15 of 20

Thread: SAW TABLE (Bench) Tutoral Part 1

  1. #1
    Join Date
    Aug 2003
    Location
    extreme southeast Nebraska
    Posts
    3,113

    SAW TABLE (Bench) Tutoral Part 1

    SAW TABLE (BENCH) TUTORAL by Jr. Strasil


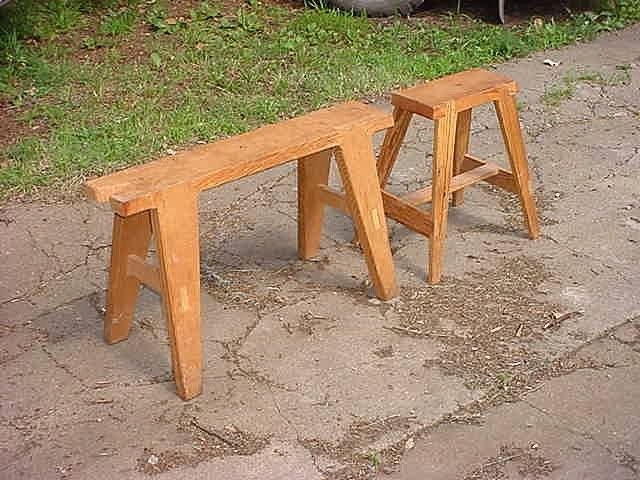
    Saw Tables - This is what the tutoral is on.


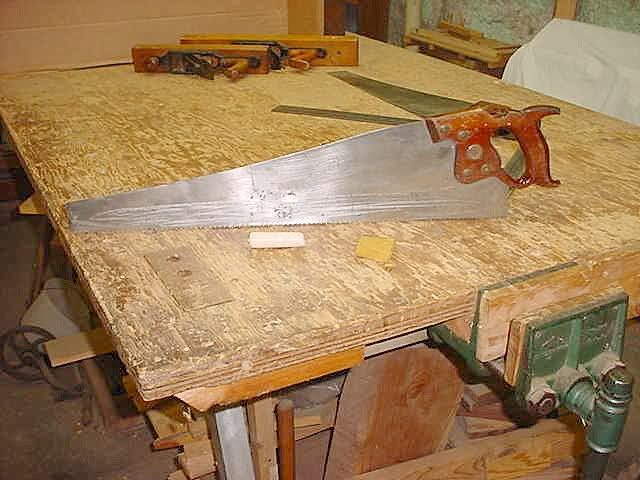
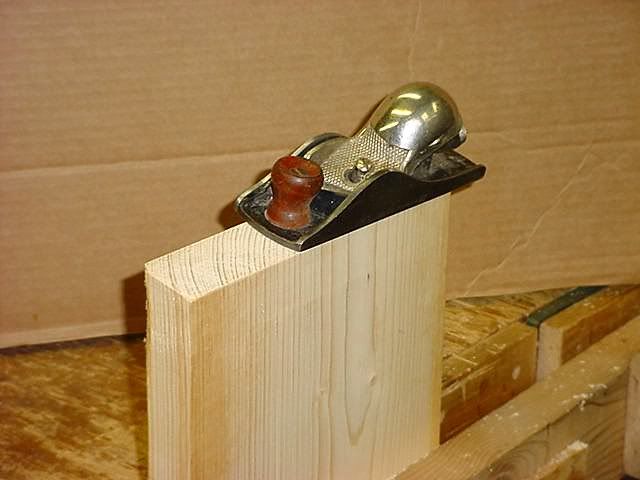
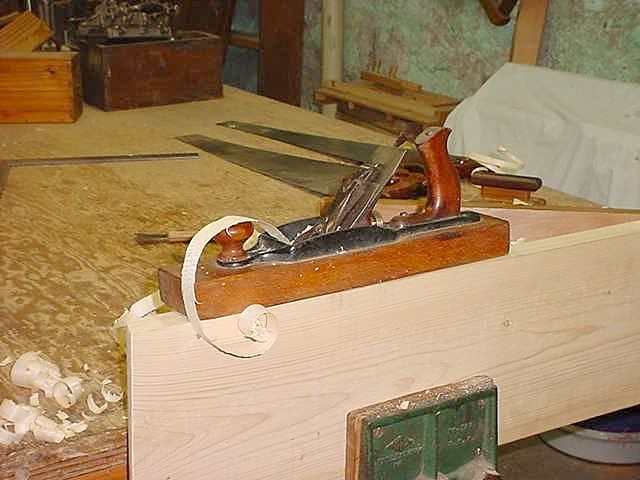
    Tools needed for this tutoral.


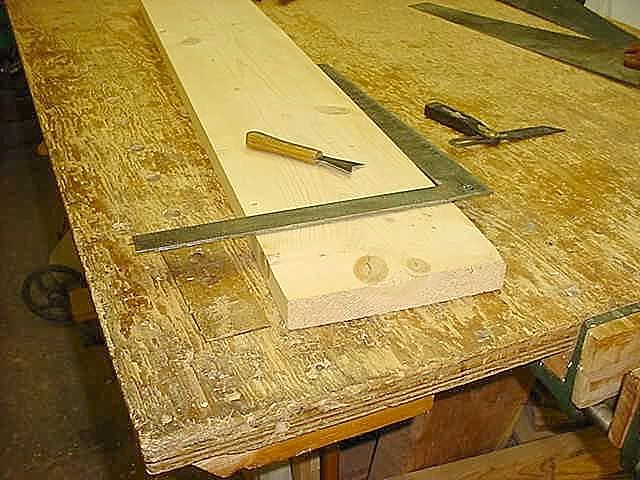
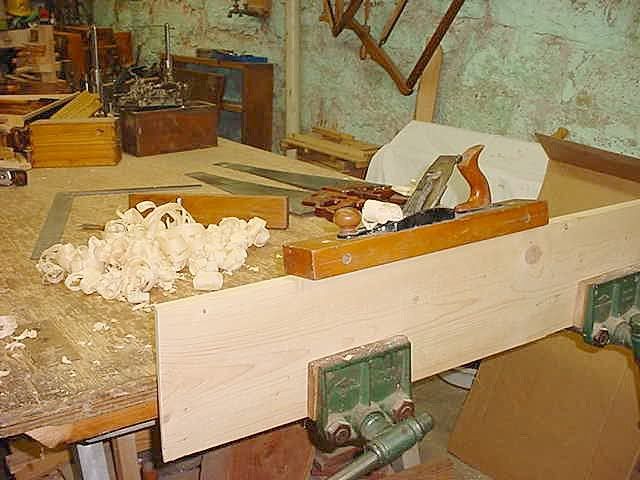
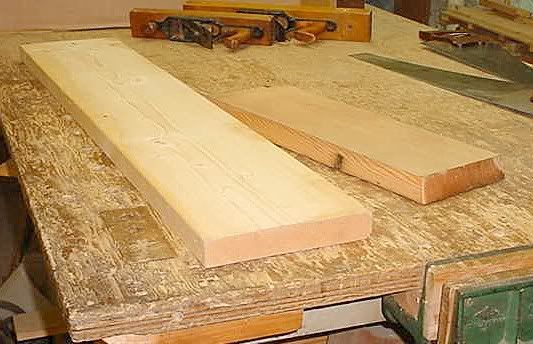
    The board on the left is what I am going to use for the top of my bigger saw bench. The board on the right is the one I have already started for my trailer shop, the ends and sides have already been prepared.


    Before we go any farther I am going to type a bit on the normal specs for what we would call a saw horse. 4 foot long, 2 foot tall, the legs splayed out 10 degrees and splayed to the front and back 10 degrees. the top was usually left up to the builder as to if it was on edge, flat or what width.

    We are only going to be interested in the 10 degree splaying of the legs for stability.

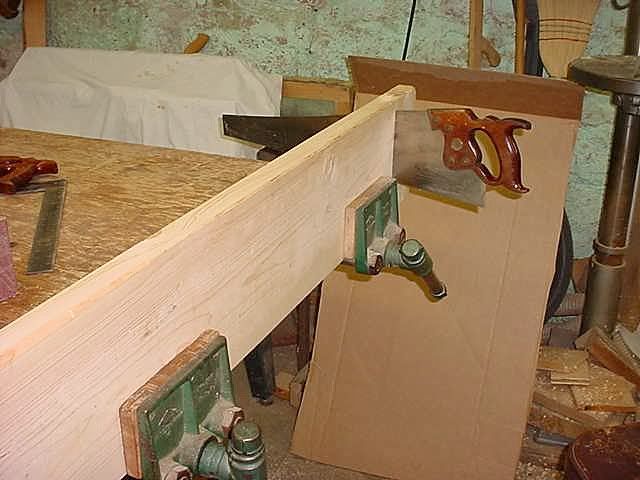
    Remembering that we are going to be using this bench to sit on and work 2 foot tall is too tall. It should be a little taller than a normal kitchen chair so your thighs have a slight downward angle for comfort. I prefer 20 inches for my benches as that is comfortable for me, you will have to decide the height you want it to be. It should be wide enough to set on comfortably for at least a half hour but not so wide that it puts pressure on your femoral artery and causes discomfort as you are going to be setting astride. Length is up to you also, just leave the board at least 1 1/2 inches longer to facilitate cutting the tapers on the ends.

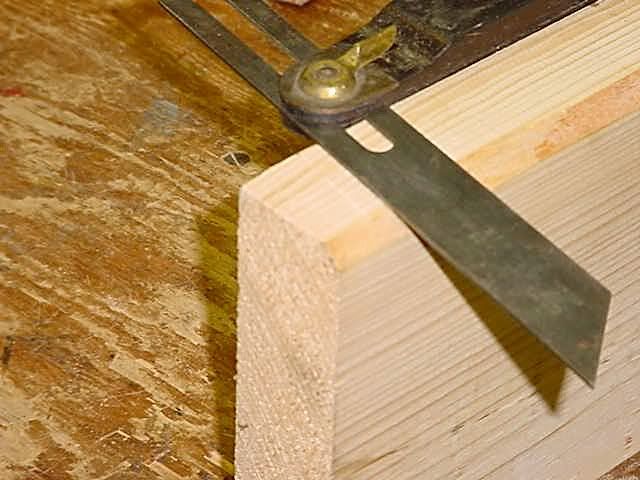
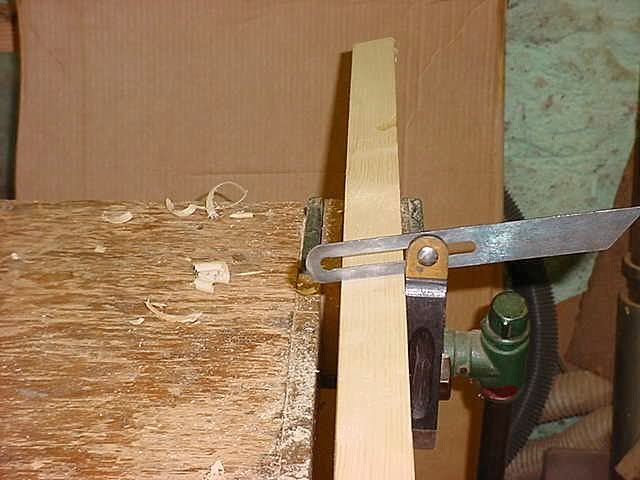
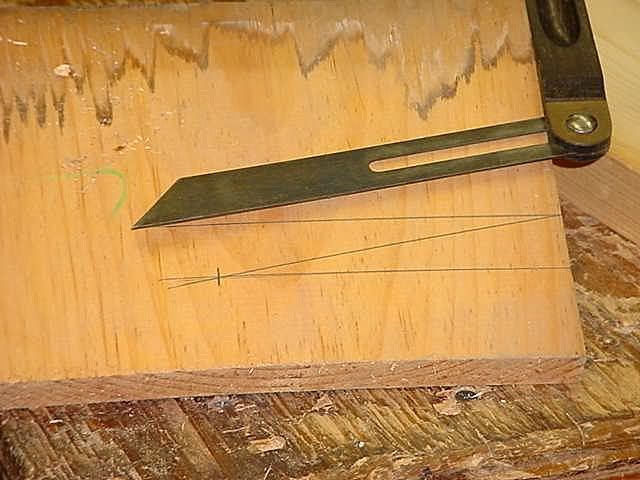
    The dovetails for the legs don't have to be any certain degree, but I like 10 degrees. you can use whatever you want. To set your bevel square at 10 degrees, use a scrap board and mark a line across it at 90 degrees, then put another mark an inch from the first one, measure in from the edge 5 1/2 inches and put a mark on one of the lines. Set your bevel so it lines up with the outside edge of one mark and the 5 1/2 inch mark of the other mark. Save this scrap in case something happens to move the bevel blade.

    Last edited by harry strasil; 07-16-2006 at 1:12 PM.
    Jr.
    Hand tools are very modern- they are all cordless
    NORMAL is just a setting on the washing machine.
    Be who you are and say what you feel... because those that matter... don't mind...and those that mind...don't matter!
    By Hammer and Hand All Arts Do Stand

  2. #2
    Join Date
    Aug 2003
    Location
    extreme southeast Nebraska
    Posts
    3,113

    Saw Bench #1a

    Determine which side of your board is going to be the top and using the preset bevel square, scribe a line on the edge of one end so the bevel will slope out from the top side and a short distance in from the end so the scrap doesn't break off when you are sawing.


    Using the framing square and the scribing knife, scribe a line across the top side of the board. Cutting from the front you will not have any tearout on the topside when sawing.


    Notice the short piece of candle and the bit of beeswax in front of the saw. I always put a little wax on my saws when making long cuts so the saw glides thru and doesn't bind.


    Clamp the board in your bench vise and using the scribed lines saw on the waste side of the mark as shown. You will need to mark the edge bevel on the other end on the opposite edge so when you turn it over to saw the other end the bevel mark will be on the top side. This shows the set up for a right handed person.

    Jr.
    Hand tools are very modern- they are all cordless
    NORMAL is just a setting on the washing machine.
    Be who you are and say what you feel... because those that matter... don't mind...and those that mind...don't matter!
    By Hammer and Hand All Arts Do Stand

  3. #3
    Join Date
    Aug 2003
    Location
    extreme southeast Nebraska
    Posts
    3,113

    Saw Bench 1b

    Clean up the tapered end cuts with a block plane held at an angle and finish with a sanding block and remove the feathers on the edges. And I hope Mr. Murphy of Murphy's Law fame is not helping you like he did me, I cut one taper one way and the other end the opposite so had to resaw one end. LOL


    Now with the Jack Plane set a little Rank, start planing on the top edge checking with the bevel square till its close.


    Finish up with the Fore or Jointer set fine and keep checking with the bevel square till it suits you.


    You now have all four sides tapered and the next step is laying out the legs for cutting.


    I hope you are with me so far.
    Jr.
    Hand tools are very modern- they are all cordless
    NORMAL is just a setting on the washing machine.
    Be who you are and say what you feel... because those that matter... don't mind...and those that mind...don't matter!
    By Hammer and Hand All Arts Do Stand

  4. #4
    Join Date
    Jul 2005
    Location
    The Kudzu Patch
    Posts
    770
    Yea, I am with you but can I offer a suggestion? Well I am going to anyway.

    Could you start by telling us what we/you are going to do first? It too me a while to realize we/you were making the top. Maybe it is just me but it helps me knowing which piece you making.

  5. #5
    Join Date
    Aug 2003
    Location
    extreme southeast Nebraska
    Posts
    3,113
    Jr.
    Hand tools are very modern- they are all cordless
    NORMAL is just a setting on the washing machine.
    Be who you are and say what you feel... because those that matter... don't mind...and those that mind...don't matter!
    By Hammer and Hand All Arts Do Stand

  6. #6
    Join Date
    Jul 2005
    Location
    The Kudzu Patch
    Posts
    770
    I guess I wasn't clear. I meant what part you were starting on/building. You jumped in with how to build it and I had no idea if you were starting with the top, a leg a stretcher or what. Had to get about half way through before I was sure this was the top.

    Other than that I think it was good! Look forward to building one... no two.

  7. #7
    Harry,

    Great tutorial and I love the pictures. This makes things so easy to follow and provides so much inspiration to working with neander tools. Sometimes we miss out on so much by not making something the old fashion way every now and then. I am going to follow this thru it's entirity and attempt to make one exactly as you have been so kind to provide the instructions for.

    Thanks for taking the time to share your experience and knowledge with us in this manner.

  8. #8
    Join Date
    Aug 2003
    Location
    extreme southeast Nebraska
    Posts
    3,113
    I been offered the use of an online chat room one day a week that is used only one day a week by the site. This could be utilized to answer questions in a live type environment, if bench builders would like to do so.
    Jr.
    Hand tools are very modern- they are all cordless
    NORMAL is just a setting on the washing machine.
    Be who you are and say what you feel... because those that matter... don't mind...and those that mind...don't matter!
    By Hammer and Hand All Arts Do Stand

  9. Stanley 140

    Harry,

    very nice photos. Please allow me one question. On one of the pictures I see a skew plane. Is it the #140 Stanley? Next question (and now you realize that I am a beginner ) why didn´t you use a low angle block plane?

    Thank you
    Bernhard

  10. #10
    Join Date
    Aug 2003
    Location
    extreme southeast Nebraska
    Posts
    3,113
    No, its not a stanley, its a stanley 140 copy, a miller falls 07 I believe. It was already out of the tool box so I just grabbed it. LOL
    Jr.
    Hand tools are very modern- they are all cordless
    NORMAL is just a setting on the washing machine.
    Be who you are and say what you feel... because those that matter... don't mind...and those that mind...don't matter!
    By Hammer and Hand All Arts Do Stand

  11. Thank you Harry
    Bernhard

  12. #12
    Join Date
    Aug 2003
    Location
    extreme southeast Nebraska
    Posts
    3,113
    I revised this a little in an attempt to clarify it some.

    We do learn as we go along don't we!
    Jr.
    Hand tools are very modern- they are all cordless
    NORMAL is just a setting on the washing machine.
    Be who you are and say what you feel... because those that matter... don't mind...and those that mind...don't matter!
    By Hammer and Hand All Arts Do Stand

  13. #13
    Join Date
    Feb 2004
    Location
    Modesto, CA
    Posts
    2,364
    Okay, I've got my two tops cut and planed. I'm making two cause I figure I can use the practice.
    Mark Rios

    Anything worth taking seriously is worth making fun of.

    "All roads lead to a terrestrial planet finder telescope"

    We arrive at this moment...by the unswerving punctuality...of chance.

  14. #14
    Join Date
    Dec 2003
    Location
    Aiken, SC
    Posts
    77
    Harry,

    Good job on Part 1. Chomping at the bit for Part 2.

    Mark Rios was playing possum on us all along ... he's got two benches in progress!

  15. #15
    Join Date
    Feb 2004
    Location
    Modesto, CA
    Posts
    2,364
    Hey, I'm just trying to watch my place and not get in the way of you real woodworkers. I fully appreciate you folks putting up with me and letting me play.

    I still don't have any of the planes that I purchased on ebay. The one I mentioned earlier still has never come nor have I gotten any response from the seller. WHAT A FLAKE!!! Now I have to go through the ebay and Paypal process. That guy is a major toilet head. THe other two are on their way, responses prompt from the other sellers.

    Anyway, got off track.....I went to HD to get a bigger plane than my 60 1/2 and found a "Buck Brothers Jack Plane". I figured that if I tuned it up real good that it should work good enough. Well, it was maybe just barely good enough. (I hate good enough BTW). The skinny blade steel was about a 25 on the hardness scale. Sharpened fast and dulled even faster. I tried and tried to get the chip breaker to mate flat, working it and working it but it also was VERY thin and junky material and never worked very well. When I tried flattening the sole, pieces of the crap metal kept coming off and I had to stop and pick the tiny chunks out of the stones and paper. Eventually, I just quit wasting my time with it.

    I finally got the edges planed and then promptly took the plane back. I don't want to ever see that thing again. I should have known better but that's what my amateurness and my boneheadedness get me I guess.

    Last edited by Mark Rios; 07-19-2006 at 8:59 AM.
    Mark Rios

    Anything worth taking seriously is worth making fun of.

    "All roads lead to a terrestrial planet finder telescope"

    We arrive at this moment...by the unswerving punctuality...of chance.

Similar Threads

  1. Bench Renovation - the bench to build a bench!
    By Alan DuBoff in forum Neanderthal Haven
    Replies: 24
    Last Post: 04-22-2006, 6:40 AM
  2. Bench Ergonomics
    By Dave Fifield in forum General Woodworking and Power Tools
    Replies: 7
    Last Post: 01-07-2006, 5:49 PM
  3. Need help with bench dogs
    By Bob Noles in forum General Woodworking and Power Tools
    Replies: 10
    Last Post: 02-17-2005, 9:15 AM
  4. The Learning Bench (Pics)-(LONG)
    By John Miliunas in forum General Woodworking and Power Tools
    Replies: 63
    Last Post: 02-06-2005, 9:42 AM
  5. Hacker Bench in Progress
    By Tom LaRussa in forum Neanderthal Haven
    Replies: 14
    Last Post: 10-26-2004, 9:49 AM

Posting Permissions

  • You may not post new threads
  • You may not post replies
  • You may not post attachments
  • You may not edit your posts
  •