Plane adjusting mallet:
69CG9242.sized.jpg69CG9243.sized.jpg
Bowsaw (hardware from Tools For Working Wood):
69CG9514.sized.jpg69CG9520.sized.jpg69CG9522.sized.jpg
Keep 'em coming!
Salem


 Member
Plane adjusting mallet:
69CG9242.sized.jpg69CG9243.sized.jpg
Bowsaw (hardware from Tools For Working Wood):
69CG9514.sized.jpg69CG9520.sized.jpg69CG9522.sized.jpg
Keep 'em coming!
Salem
 Contributor
Those are beautiful, Salem. Your tools have a gentle quality to them. What wood are you using?
A few more ...
One of the easier tools to make is a handle for a chisel. A little more interesting is to regrind the slab sides of the blade (this one was an old Stanley/Marples/Irwin) into something you would enjoy using on dovetails. This one was for a friend ..
Another jointer. This one is 30", Jarrah, and uses a 2" wide Hock blade. It is light and so comfortable to use. Ideal for jointing edges.
Make your own lever caps and lever cap screws without machinery: http://www.inthewoodshop.com/ShopMad...0Backyard.html
And a small smoother, inspired by a design of Steve Knight, and using one of the handmade 1/4" thick Chinese Galoot Tools laminated blade he sent me.
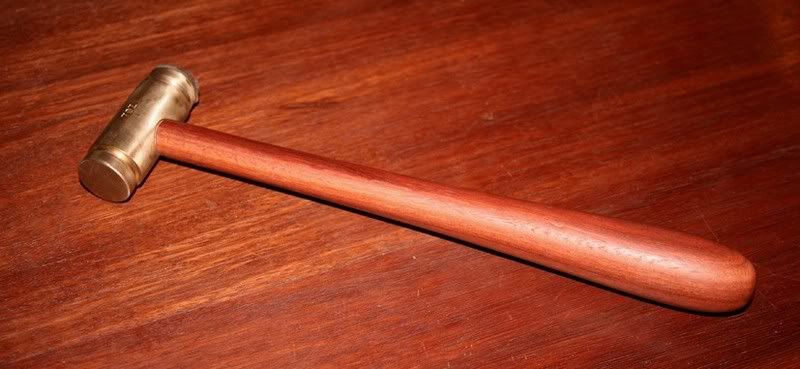
Of course there are the obligatory hammers. This one is brass and ebony for adjusting planes.
A
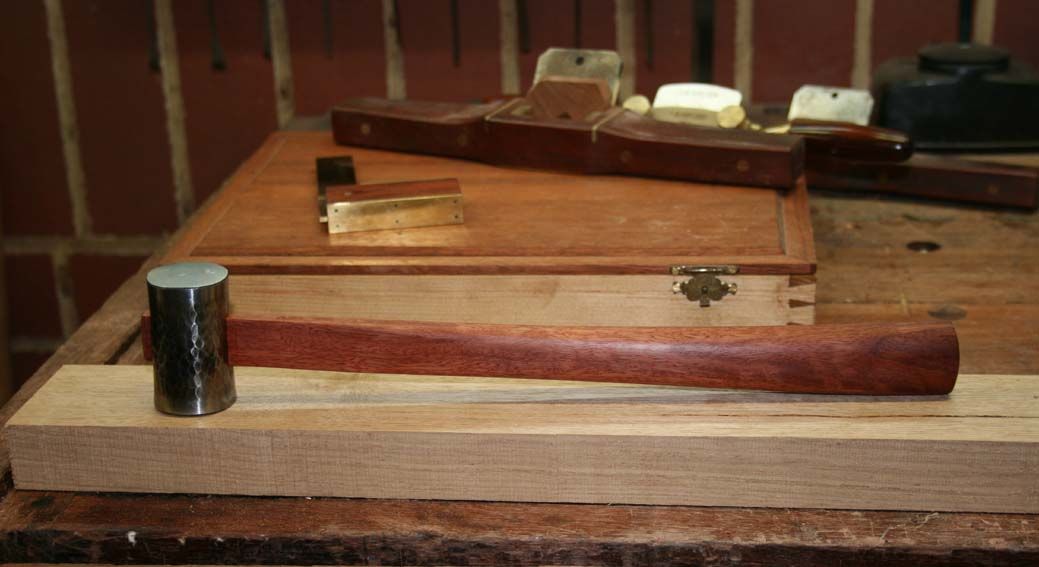
nd this one is a gennou (no, I did not make the head. That is by a famous maker, Tenryuu. All I did was design and shape the handle...
Last one for now, a stair saw made several years ago..
Regards from Perth
Derek
Member
Thanks Derek!
My woods are mostly scrap. Many of these tools were made out of the offcurs from a stair company.
By the way I love the handle on your stair saw!
Salem
Last edited by Salem Ganzhorn; 06-18-2011 at 9:40 AM.
 Member
[QUOTE=Brian Ashton;1714268]
I'll be using the router plane attached below that I made a few years back. QUOTE]
Can you share some more pics and details about the router plane? Simply gorgeous!

 Member
A simple shop made marking gauge. Ebony & persimmon. Fine adjustment is tapping the rear on the bench top.
Deane
Originality is the art of concealing your source.
Franklin P. Jones
Comments & criticism on postings welcomed.
 [OP]
Member
[OP]
Member
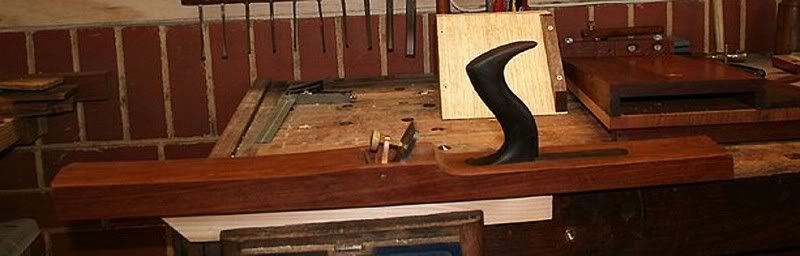
There has been a bit of interest in the router plane so I am posting some pictures for those interested to get an idea of how it was made. Dimensions, should be able to extrapolate from the 4th picture that has a ruler. When I made it I was extremely loose on dimensions.
Materials are cocobolo, brass and stainless steel.
All hand made in that the lathe was a wood lathe and the cutting and filing was all done free hand, i.e. no milling machines or specialized tools to work the metals.
Sent from the bathtub on my Samsung Galaxy(C)S5 with waterproof Lifeproof Case(C), and spell check turned off!
[OP]
Member
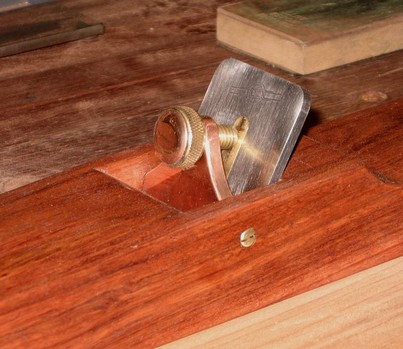
More detailed pics of the various parts.
I guess the most exotic piece of equipment i have to make the parts was a independent 4 jaw chuck which allowed me to do the offset turning of the tool holder post and hold the locking ring while it was turned to a basic shape. The V channel was filed with a square file until it and the base where in alignment. I just eye balled it for being reasonably true. As this is a router plane there wasn't a need for 100% precision - it's close enough at a about a degree out. The post doesn't need to be offset turned but just make sure you draw it out first to make sure everything will fill together well.
The locking ring was cut out and filed to shape after I turned it to a basic outside shape of a tear drop. It started out as a 1 1/2 x 1/2" piece of flat bar - turns dead easy with basic wood turning tools. There is no reason that it would need to be turned first except if you want the turned bit on the end where the locking screw sits. Other than that you can easily shape one by hand.The locking knob was a piece of 1" hex brass rod.
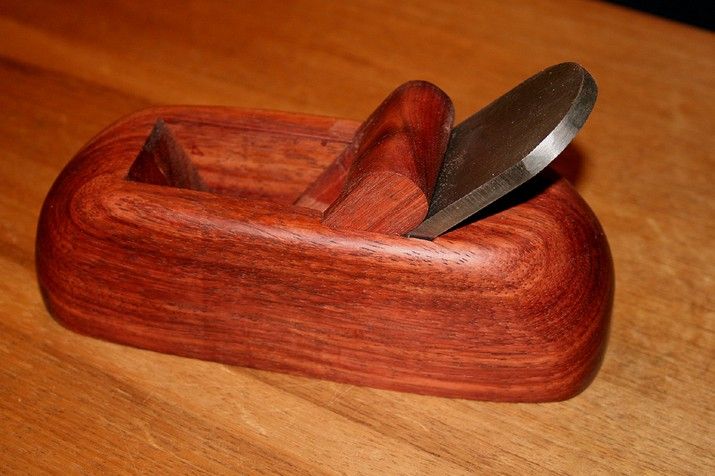
The router base picture gives the basic dimensions... I jigged up a piece of plywood that was mounted on a faceplate that allowed me to mount the base on the lathe to offset turn the areas where the handles sit and drill the dowel holes.
Next two pics give an idea of how they all went together...
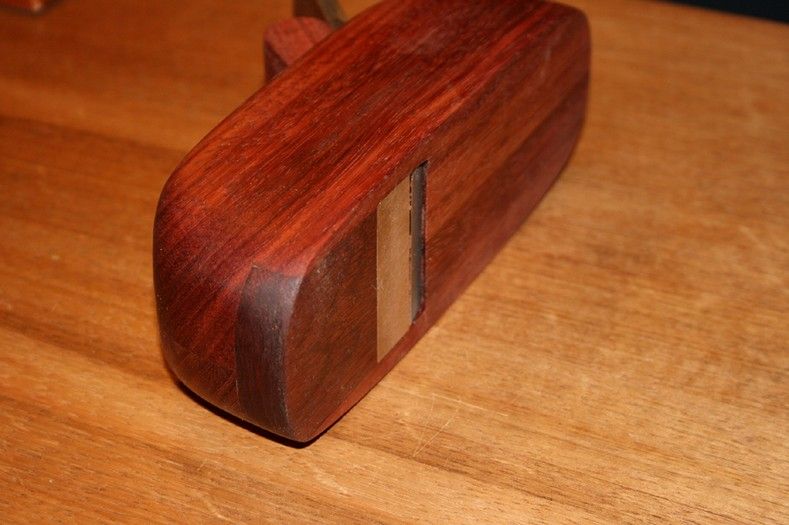
And the final pic gives some basic dimensions of the handles.
Now get cracking and make one for yourself!
Sent from the bathtub on my Samsung Galaxy(C)S5 with waterproof Lifeproof Case(C), and spell check turned off!
Member
Thanks for posting the detailed pictures. I can understand putting this kind of effort into a router plane as it is one of my favorite tools. But yours is the best looking I have seen!
Salem
 Member
Brian,a beautiful router. It really has the look of a tool made by a good craftsman 100+ years ago. If you do not mind a little advice: countersunk screws should always be flush with the surface. I made that same mistake many years ago. And,could you possibly find any slotted screws to use instead of those square drive ones? Otherwise,a GREAT piece of work. I'd gladly knurl that hex bolt for you for free,with an antique type convex knurl,except you are a long way off. I'd have to turn it round,though. If you send it to me with return postage I'll do it for free.
You have a good sense of design.
Needless to say,Derek has,too,and posts many very nice tools. There are MANY nice tools posted in this interesting and useful,inspirational thread. Good work,all.
Last edited by george wilson; 06-26-2011 at 9:48 AM.
 Contributor
Awesome router. I agree in that a router plane is def my favorite tool in my shop. Everytime I use it for something I am amazed at how well it does its' job. It is often taken for granted how important flat parallel surfaces are in woodworking. Such as tenons, just running a shoulder or rabbet plane over the face does not garuntee a parallel surface and can throw your peice out of true with the connecting peice.
Very nice job and very good layout for others to see how it was built.
Contributor
Really gorgeous router plane Brian.
I am curious about the blades. In the photo showing the three blades, It looks like the first two are single piece construction, but the third looks like it is two piece with the blade attached to the shaft with a screw. Do you find the two piece works as well as the other two? I ask because I have been thinking of making a router plane, and I was wondering whether to make a two piece blade as you show, or if I would be better off making or buying a single piece OWT.
Thanks for the additional photos. I love threads that show this kind of detail.
-Jeff
Member
Shop made Ebony marking gague with a captive persimmon key. I do the fine adjustment by tapping the end on the bench top while pressing the but of the key with my thumb. Low tech.
Deane
Originality is the art of concealing your source.
Franklin P. Jones
Comments & criticism on postings welcomed.
[OP]
Member
I like it! simple but yet elegant.Originally Posted by Deane Allinson

Sent from the bathtub on my Samsung Galaxy(C)S5 with waterproof Lifeproof Case(C), and spell check turned off!
[OP]
Member
Thx George!
I know what you're saying about the counter sinking... I drilled them by hand and it was pretty hit and miss on getting them just right or not, so I over did it on them to try and hide the variation in depth. In hind site I should have left them all proud and lapped them flat along with the base plate - that'll be version 2.3s variation. Also thought about the idea of a more traditional looking screw but slotted in stainless in Australia are as rare as hens teeth. Where I was living at the time, about 200 yards from the ocean, tools rust and tarnish at alarming rates so I was leaning towards salt resistant metals as much as possible. The paring chisels in the first post have marine grade aluminum ferrules for that reason. Even brass gets an incredibly thick coating of tarnish on it in no time from all the salt and humidity. When Lee Valley started making the corrosion resistant planes that was a god send for us living near the beach.
I'll take you up on your offer. PM me your address and I'll send it to you. I'll have to dig around my house for all the old US money I have kicking around - don't think your bank would take aussie plastic "play" money for the return postage.
Sent from the bathtub on my Samsung Galaxy(C)S5 with waterproof Lifeproof Case(C), and spell check turned off!
Member
Thanks for posting the details! Awesome job and very inspiring. I have a piece of Cocobol that would be perfect for a project like this. I just got my first router plane, a type 10 #271 with all the parts, so I have a bit of learning first, but I already see some areas that could use improvement.
Could you explain a little about how you turned the clamping ring if it started as a flat blank?
 Posting Permissions

 Reply With Quote