


After reading lots of good things about Rubio Monocoat and Osmo Polyox and a conversation here about a natural finish I decided to try Rubio Monocoat on a stereo cabinet project that likely will get significant abuse from albums being slid on and off the lower shelf. These hardwax oil finishes claim to be easy to repair if needed, and RM has zero VOC plus it comes in several colors, so that's why I chose it over Osmo Polyox.
I watched a few YouTube videos and reviewed the directions and info. or RM's website before giving it a try on some scrap. My initial test confirmed it's dead simple to use. Put it on with a plastic spatula, white non abrasive pad, or rag, let it sit for a few minutes, and then wipe any excess off completely, completely, completely. RM is a 2 component product that can be used as a 1 component or 2 component product. It takes around 20 days to fully cure when used as a 1 component product, about 7 days when the catalyst is added. It is seemingly outrageously priced but ends up not being all that expensive to use compared to traditional finishes because you only need to apply one coat and there's very little waste because you don't have overspray or even need to use a brush to apply it.
I used it on a walnut and Baltic birch stereo cabinet I designed. I bought a 350 ml package of "pure" which is their neutral color. It cost about $55. Outrageous, right? There is a little 275 ml can of part A and a tiny little 75 ml can of the catalyst. To apply it you mix 3 parts of Part A with 1 part of the catalyst, just mix them together and apply it. The cans came with a plastic spreader to assist distributing it on the wood without wasting any, a good idea for how much it costs per ml. That worked well on the wide open horizontal sections. Then I went back over it with a white Scotchbrite pad and also used that to do the edges and vertical surfaces. Watch some YouTube videos for more details, but it's incredibly simple to apply. Once it's on you let it sit for just a few minutes and then wipe and buff it off, thoroughly. I used blue shop paper towels. What's very impressive is you will not get lap marks if you do a section of a table top, for example, and then do another section after buffing off the first. In fact, that's the recommended way of doing any surface that takes more than a few minutes. Thinking back on how I often have rushed to do a large surface with wipe on or brushing varnish to avoid lap marks this was a very impressive characteristic. The only downside to using RM is it doesn't have the claimed spread rate. RM claims 30 - 50 m2/L, which is an average of 40 which is 0.43 sq. ft. / ml. My project had about 30 sq. ft. so 70 ml should have been enough to do it, maybe 75 allowing for waste in the non woven pad. Instead, it took about 110 ml, which is at least 50% more. A little still goes a long way, just not quite as far as RM claims. So it cost about $16 to do my cabinet. My guess is it would have taken about 10 oz of Sealcoat and 20 oz of WB clearcoat to do this cabinet had I gone that route, and that would have cost around the same amount, maybe a little more. One no stress coat using RM vs. setting up my spray booth and applying a coat of Sealcoat and then 2 coats of WB, sanding in between each coat, makes RM look pretty attractive.
I made a test sample on my walnut, following RM's directions to sand no finer than 150 grit and to vacuum and wipe it clean. I used mineral spirits because a YouTube reviewer said that's what RM's (expensive) cleaner smelled and behaved like. RM is soluble in mineral spirits, too, and that's what I used for clean-up. I'm impatient and couldn't wait a week for it to fully cure, so after only 3 or 4 days I started testing for resistance to cold water, hot water, and Bourbon. None of those did anything, although the cold water did raise the grain a little; I could feel it being a little rougher after I wiped it off. But the next morning it felt fine again. If you have read any of my other finish test reviews you'll remember that cold and hot water and Bourbon have done significant damage to some products I've tested, permanent damage in some cases so the results here were impressive for a non-film forming product. I have not yet tested it against mustard or ammonia containing cleaners.
To test how easy it is to repair I abraded off some of the finish on my test sample with 325 mesh sandpaper. After cleaning off the dust I applied some new RM finish to it, let it sit a couple of minutes, then wiped and buffed it off. There is no difference in appearance between the repaired area and the original, nor is there any overlap of finish in the old area. To me this is a huge advantage over other products when it comes to repair. Similarly, you can fill in a scratch and there's no evidence of the repair in the surrounding area. The scratch itself is still there, but the new finish makes it less noticeable. And if you want to scrape or sand out the scratch the repair would be completely invisible. When's the last time you were able to do that, easily?
OK, what's not to like? Well, it's a matte sheen, pretty much dead flat actually. So if you want some sheen you're mostly out of luck. You can apply RM's Maintenance Oil over it to give a claimed satin sheen but that's about it. I suspect you would get a higher sheen if you first sanded to a finer grit, but RM says not to go above 150 grit. I do know that the area I repaired by sanding to 325 grit before applying the new finish has the same sheen as what was sanded to 150 grit, although it does feel smooth (no surprise), so maybe not.
What's it look like?
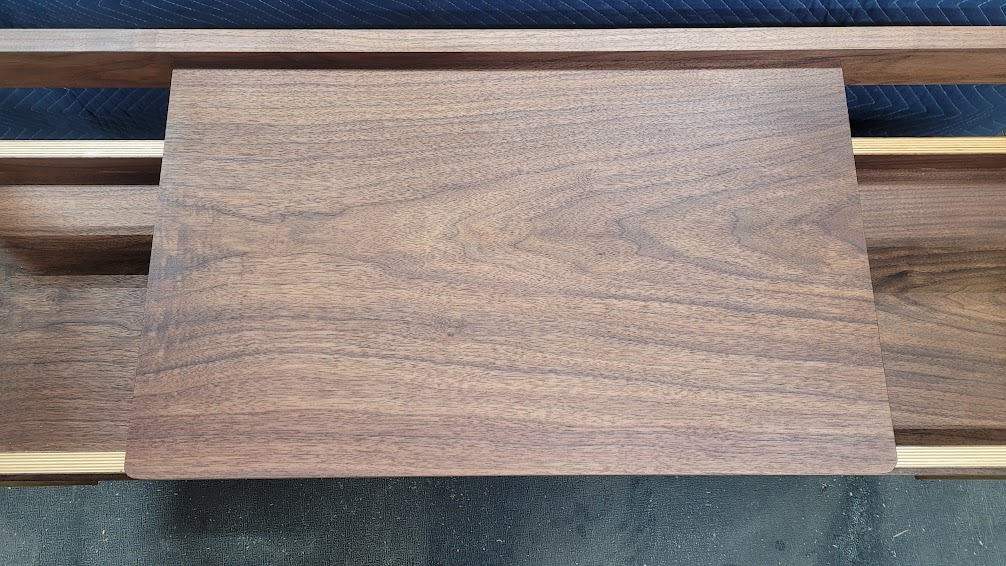
You be the judge.
John

 Reply With Quote


