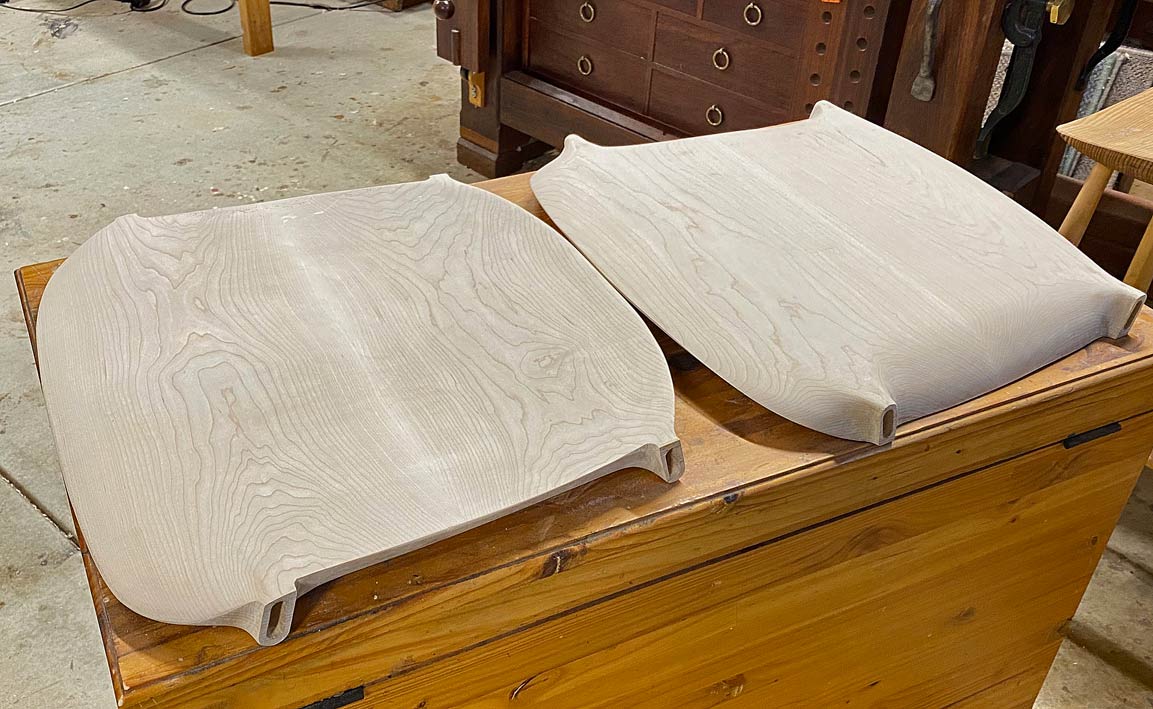
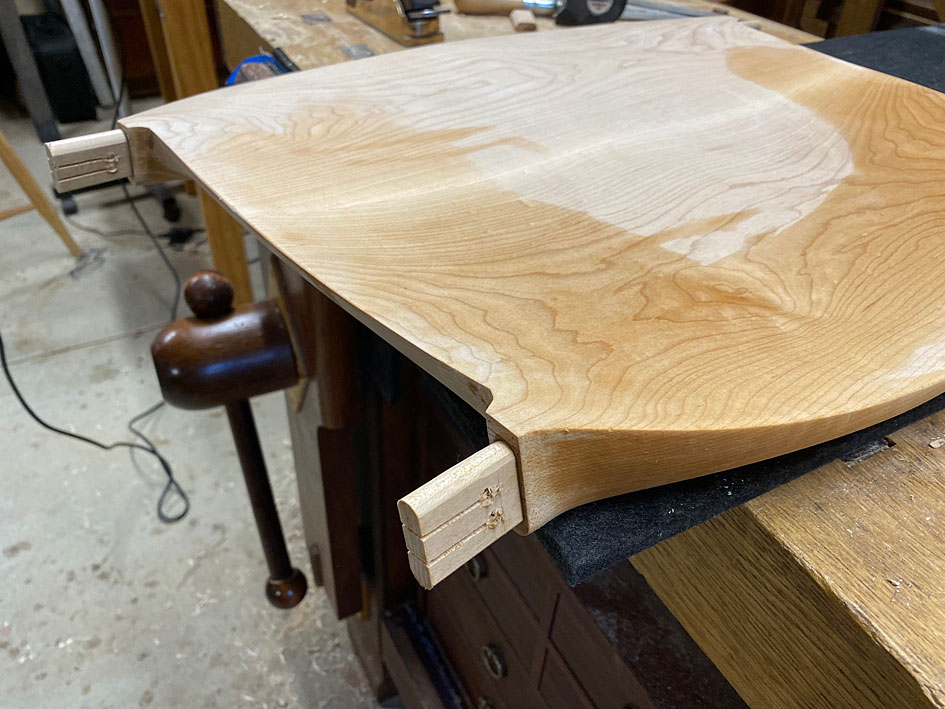
The seats have a very clean looking line to them. (I do not know any other words to describe them!)
It is so impressive watch your work progress.


 Contributor
The seats have a very clean looking line to them. (I do not know any other words to describe them!)
It is so impressive watch your work progress.
 [OP]
Contributor
[OP]
Contributor
Thanks Larry.
It is so helpful receiving feedback. I was not sure if anyone was getting something from all this. It feel back-and-forth to me. The thread was intended for discussing and there has been little.
Regards from Perth
Derek
Contributor
I’m enjoying following it. I don’t often post unless I have something specific to say, but I appreciate people’s build threads that “think out loud” and show their approach to design and construction. I appreciate the effort you put into documenting your process.
Contributor
Derek I look at everything you post. I don't feel competent to discuss work at the level you are producing. I feel I have learned from what you post and hope you keep on posting. I can appreciate what you are producing, not willing to comment on it.
Ron
[OP]
Contributor
Thanks Ben. Thanks Ron.
Don't be afraid to ask questions. There are no stupid questions. That's how we all learn. Me too.
Regards from Perth
Derek
 Contributor
Please keep posting the progress Derek! Even if we aren't all saying something I can guarantee we are all watching! The seats came out amazing! I can't wait to see what they look like on the chair frame. Doing all that shaping in rock maple is no joke! I know exactly how grueling that work is. Thanks for posting this and look forward to seeing the rest!! Amazing work as always Derek!
[OP]
Contributor
Thanks Tony!
I'll get back to the chairs this weekend. The plan is sanding seats and legs (I am so ambivalent here as the finish off the scrapers has a luster, and leaves lovely fine tracks which you can feel with fingers). Then to prepare the loose tenons (they must fit the base and the legs, and be sawn for wedges), shape the tenon base, cut the legs to length, and then glue together.
Monday I will be in hospital for an op on my left patella, and forced to rest for a couple of days.
Regards from Perth
Derek
 Contributor
Derek,
I've also been following along with a great deal of enjoyment. I haven't ever made any chairs, the closest thing was a stick built footstool, which came out nicely enough, but went together under protest. Your seat carving is lovely and I entirely agree about the scraping vs. Sanding dilemma. (I'm facing the same situation on my current project).
Good luck with the knee surgery and the forced rest!
DC
Contributor
Good luck with the surgery
Ron
Contributor
I also follow and learn from your posts but don't often have anything helpful to add.
The chair seats do have clean and nice looking lines and curves.
Keep the posts coming, and good luck with the surgery.
 Contributor
I am also inspired by your work Derek. Wish I could do something as nice. Today my big struggle was with an angled lap joint.
Here is hoping for you surgery to go well with a swift recovery.
jtk
"A pessimist sees the difficulty in every opportunity; an optimist sees the opportunity in every difficulty."
- Sir Winston Churchill (1874-1965)
[OP]
Contributor
Thanks David. Thanks Todd. Thanks Jim. Nice to know you are on board. Please do feel free to chip in with your own experiences.
Regards from Perth
Derek
 Member
Derek,
Your forethought is as inspiring as your execution.
Best wishes for a speedy recovery.
[OP]
Contributor
Thanks Joe. Much appreciated.
Regards from Perth
Derek
[OP]
Contributor
Today we reached the milestone I was patiently (okay, not so patiently) waiting for - glueing up the legs and seats. To get to this stage, however, required matching the mortices with the loose tenons, matching the loose tenons with the leg mortices, cutting slots for the wedges (into the tenons), and shaping the tenon mortise to fit the legs.
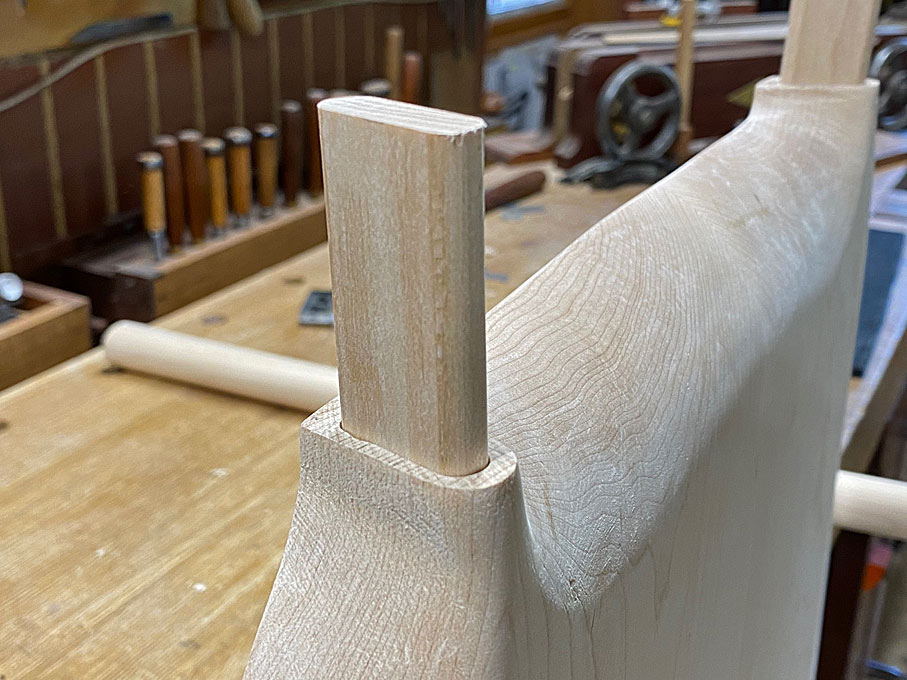
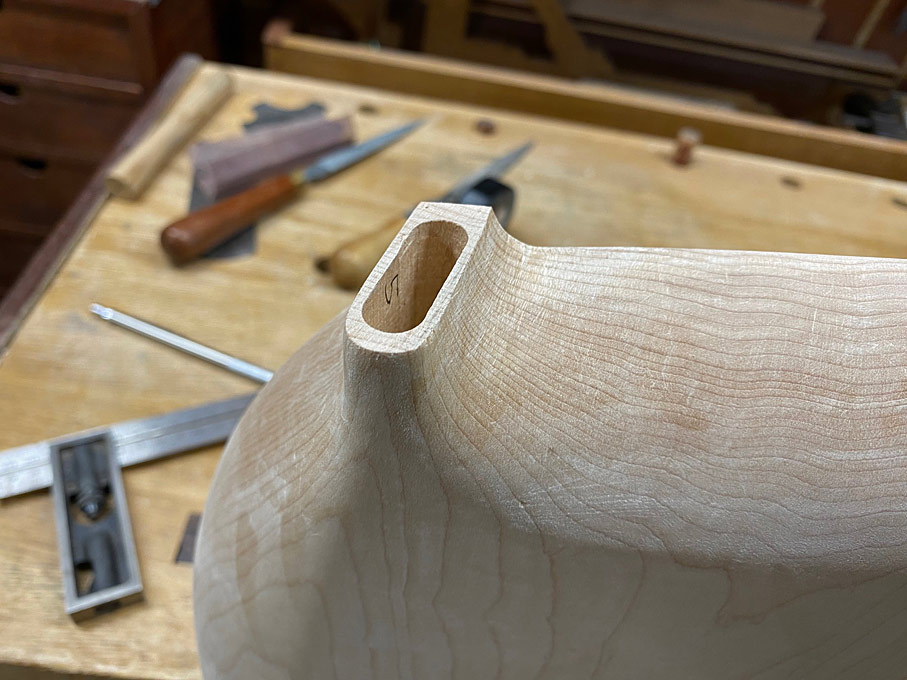
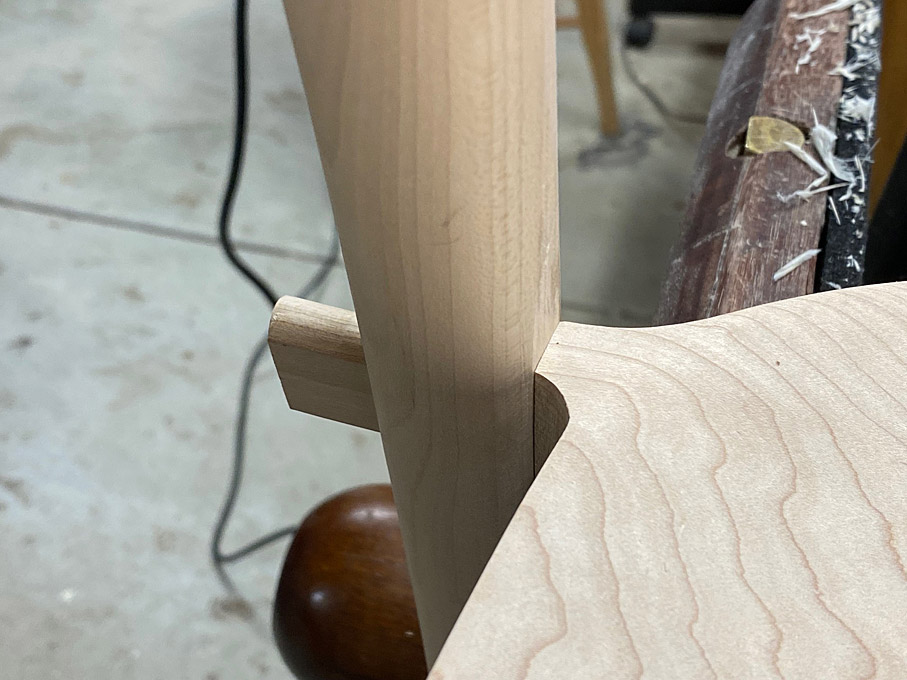
Let's start with the obvious. This is how the tenon and the tenon mortise will end up looking ...
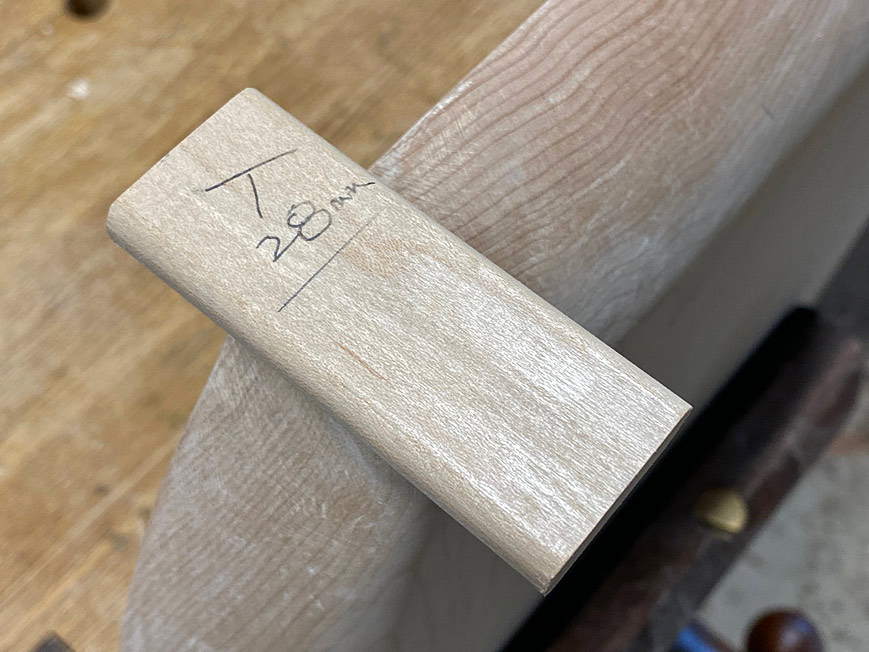
The loose tenon is 30mm wide and 10mm thick. It extends 28mm into the tenon mortise ...
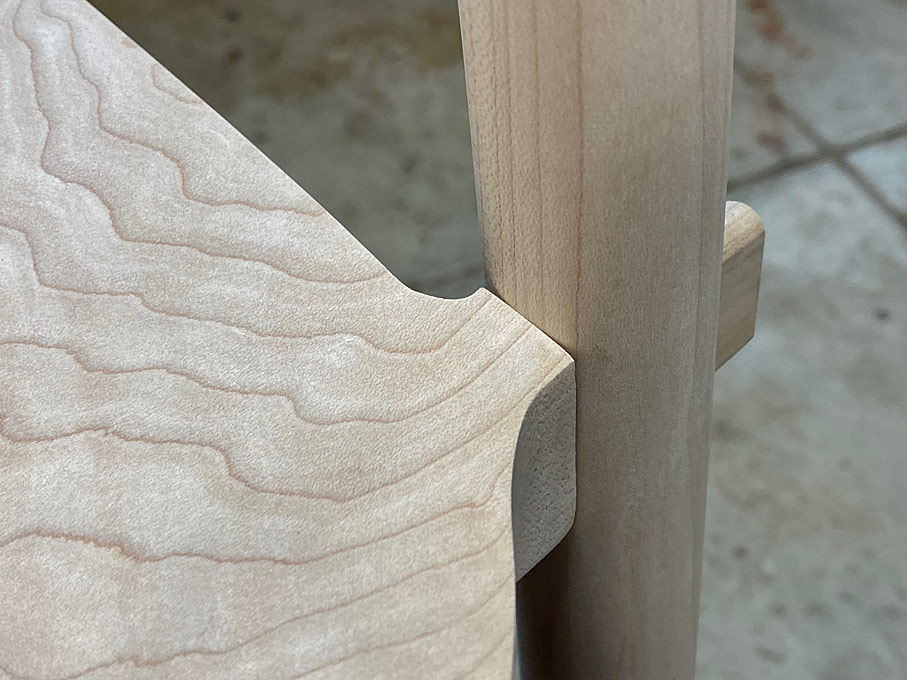
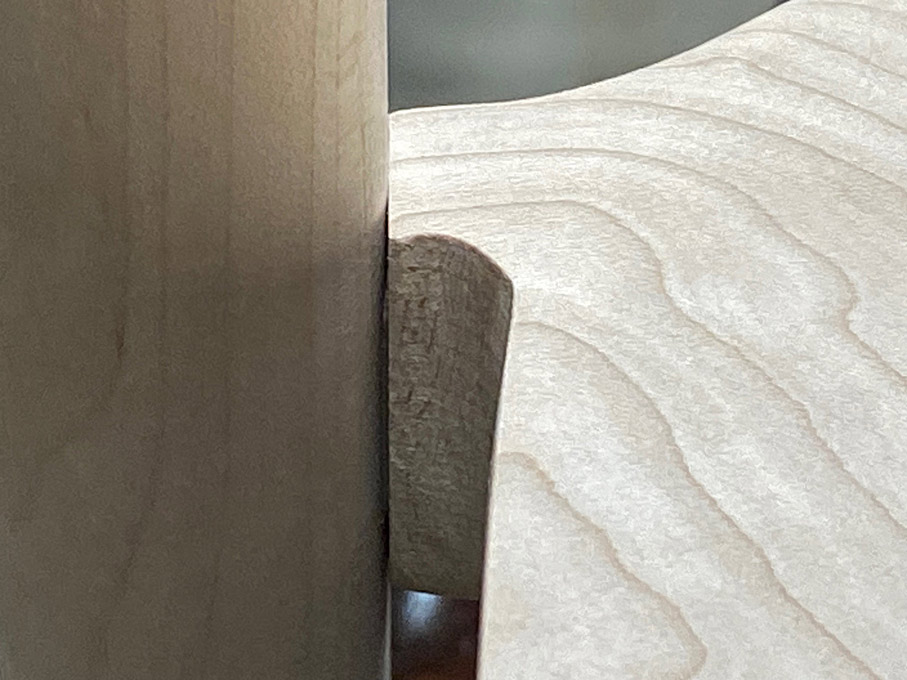
This all looks rather neat, but it was the end result of further shaping to fit the legs with the seat. The issue was that the seat mortices were chunky ...
When joined, this was the fit ...
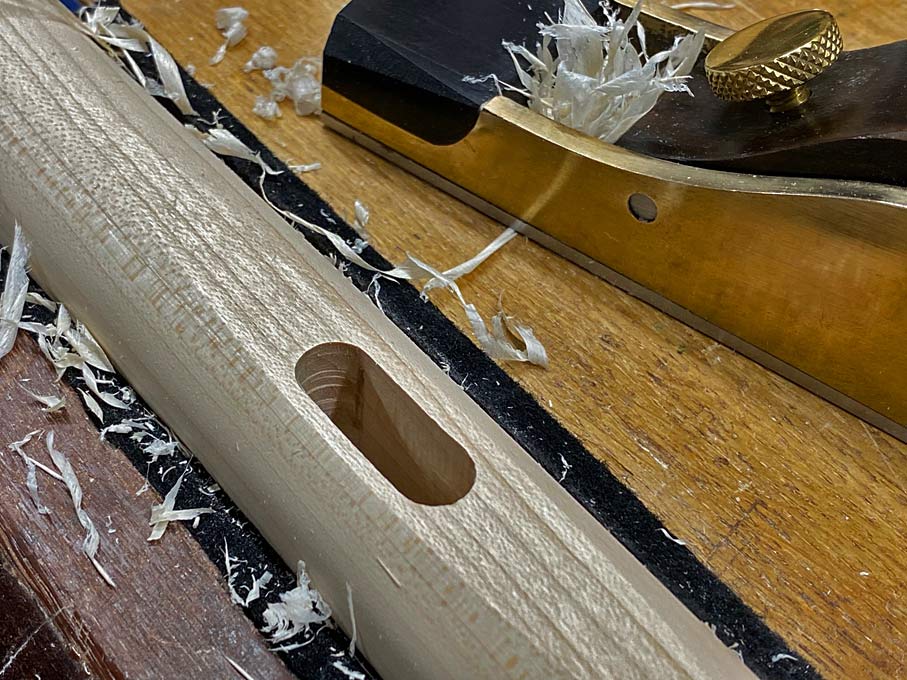
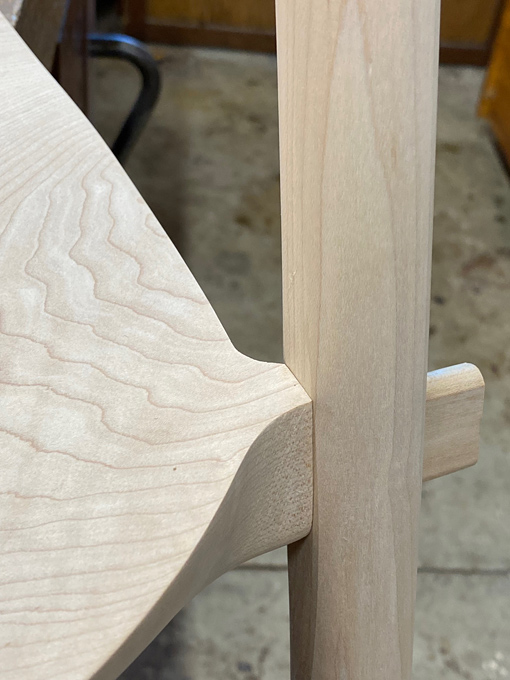
Two steps were involved. Firstly, the tenon mortise was reshaped to be thinner at the face (this involved removal of waste at the top edge and not the sides, which is needed support for the loose tenon) ...
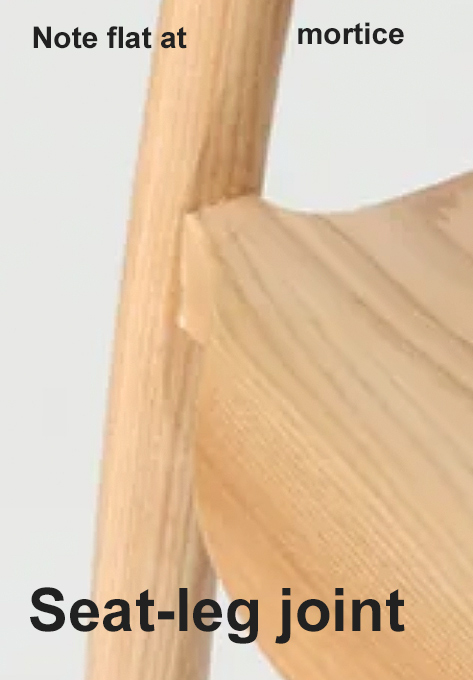
Secondly, the face of the leg mortise was planed flat to match the face of the seat mortise ...
This is how the original chair was fitted - photo I posted early on ...
This is the result ...
All the parts fitted, but not yet glued up ...
Loose tenons slotted for wedges, along with the wedges. Glue of choice: Old Brown hide glue. Why? Because at some stage in the future, hopefully many years from now, it is likely that the joinery will need to be re-glued.
The seat tenons are glued first and the glue allowed to dry (they are a bit long here, and were cut shorter before the legs were attached) ...
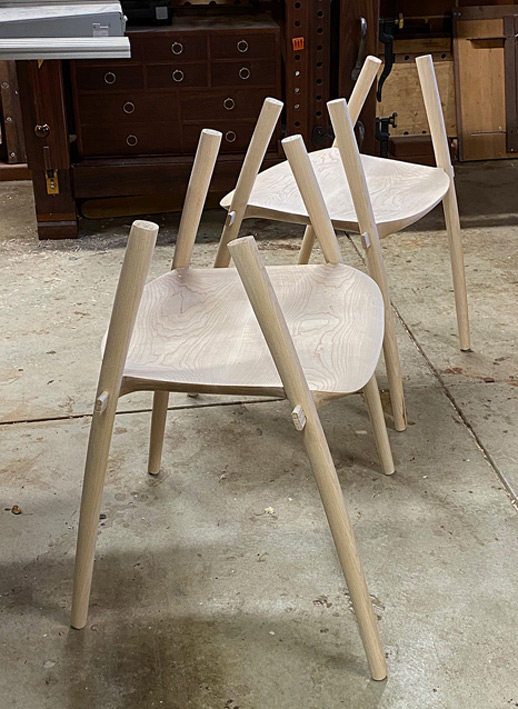
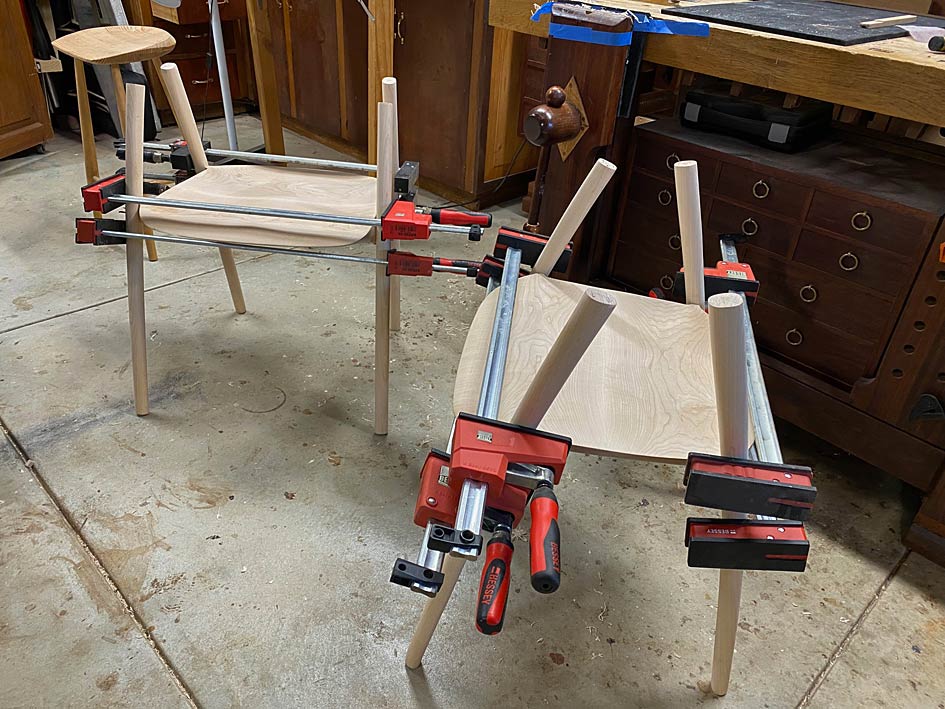
And a last photo of the final glue up. It will remain so for 24 hours.
Starting to look like chairs!
Regards from Perth
Derek
 Posting Permissions

 Reply With Quote