
-
Beginning the arms and back
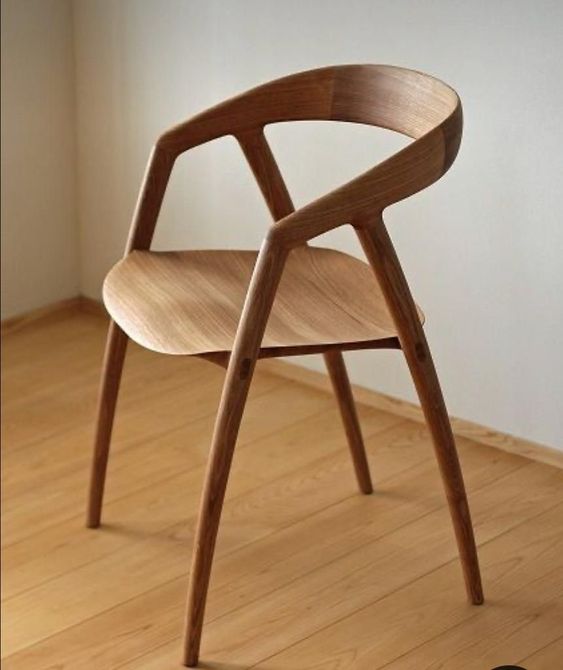
The legs and seats are done and it is time to move to the arms and backs. Once again, the chair to provide a context of where we are headed ...
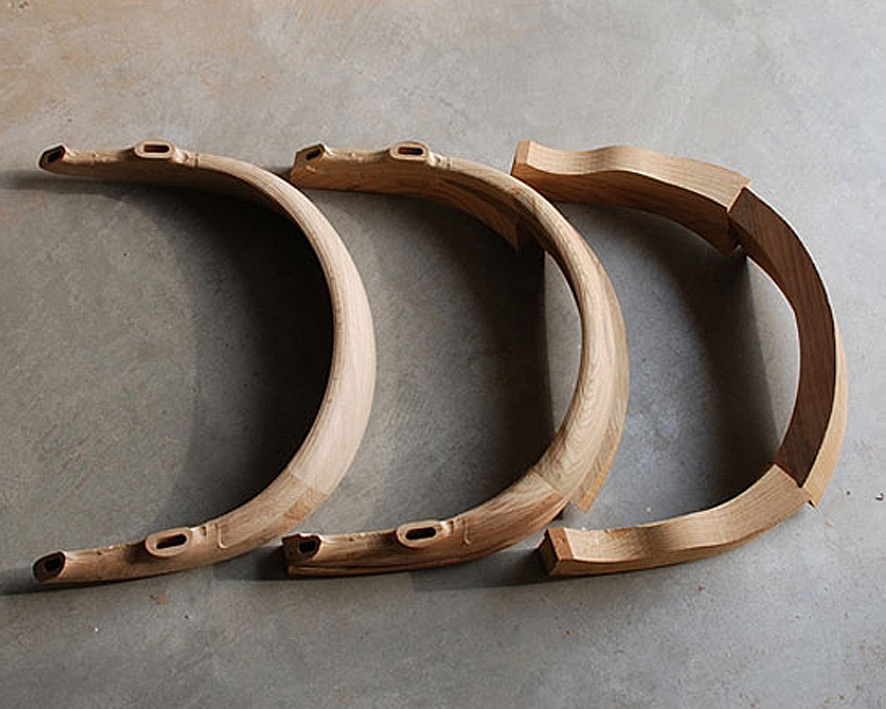
I was fortunate to find a few photos on the Web showing the development of the arms/back, which provided some insight into how to construct this ...

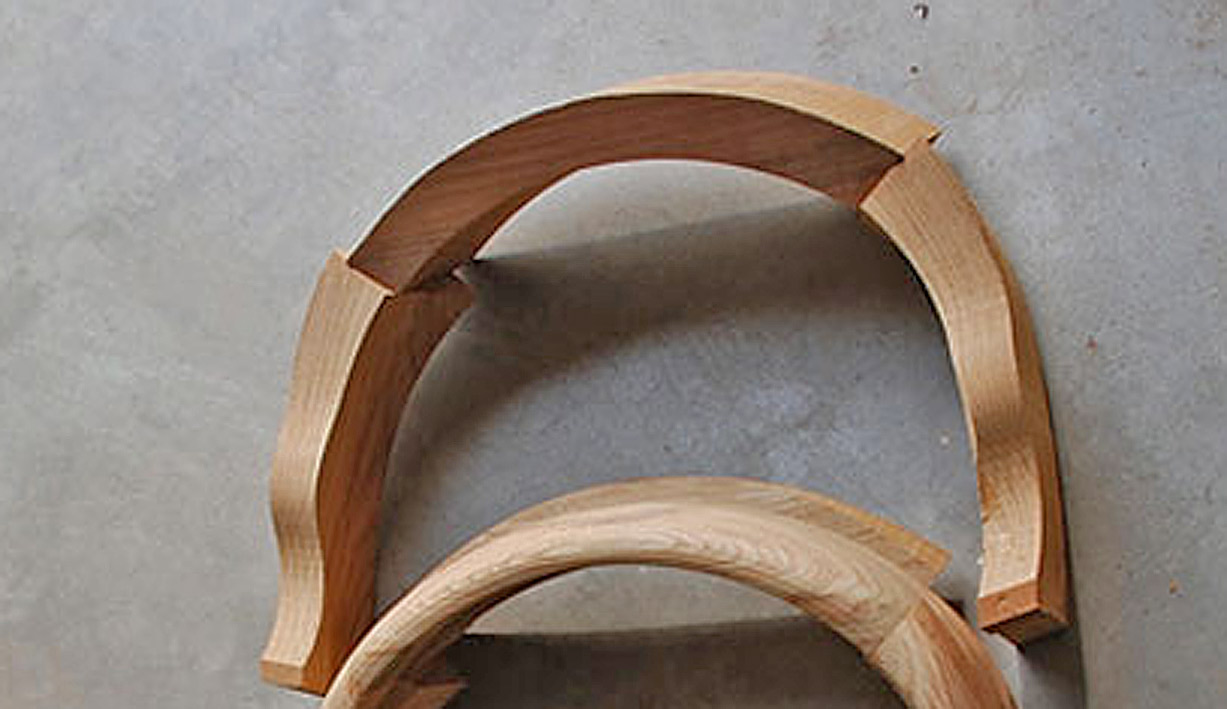
The construction sequence that was really helpful was this (note these are from the underneath) ...
While this makes it all appear accessible, my experience building a Hand Wegner chair prepared me for the large chunks that make up the two arms and the back ...

Giant slabs and lots of carving (since, unlike the factory, I do not have a CNC machine) ...

But look at the first photo in that sequence - the back is angled into the arms. Wonderful - less to carve!
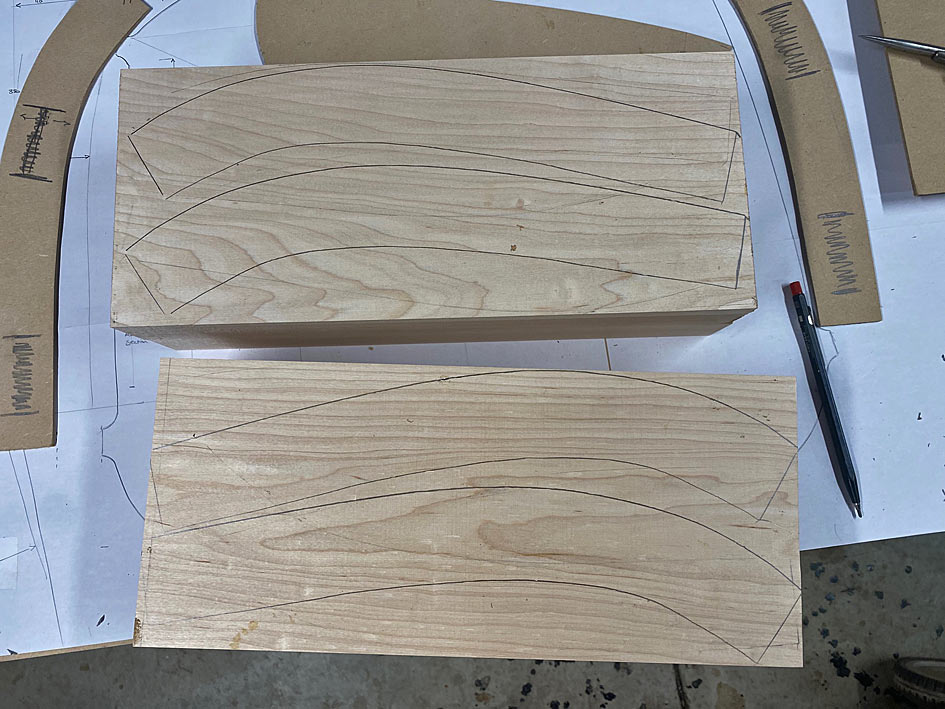
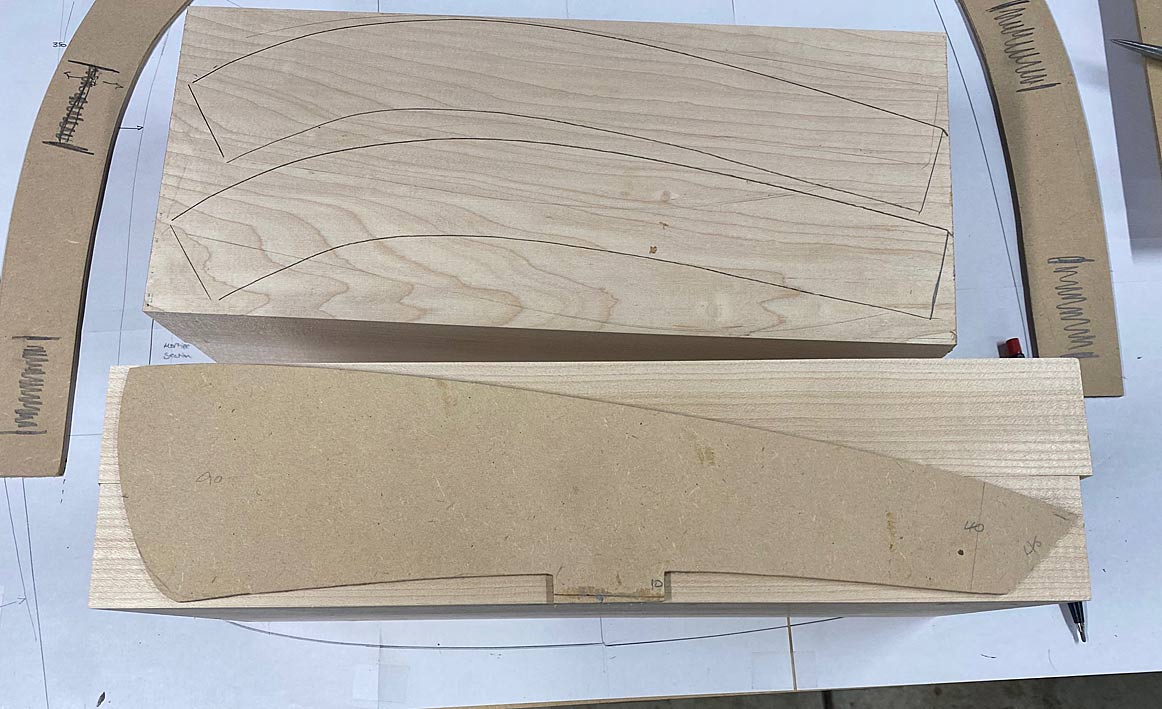
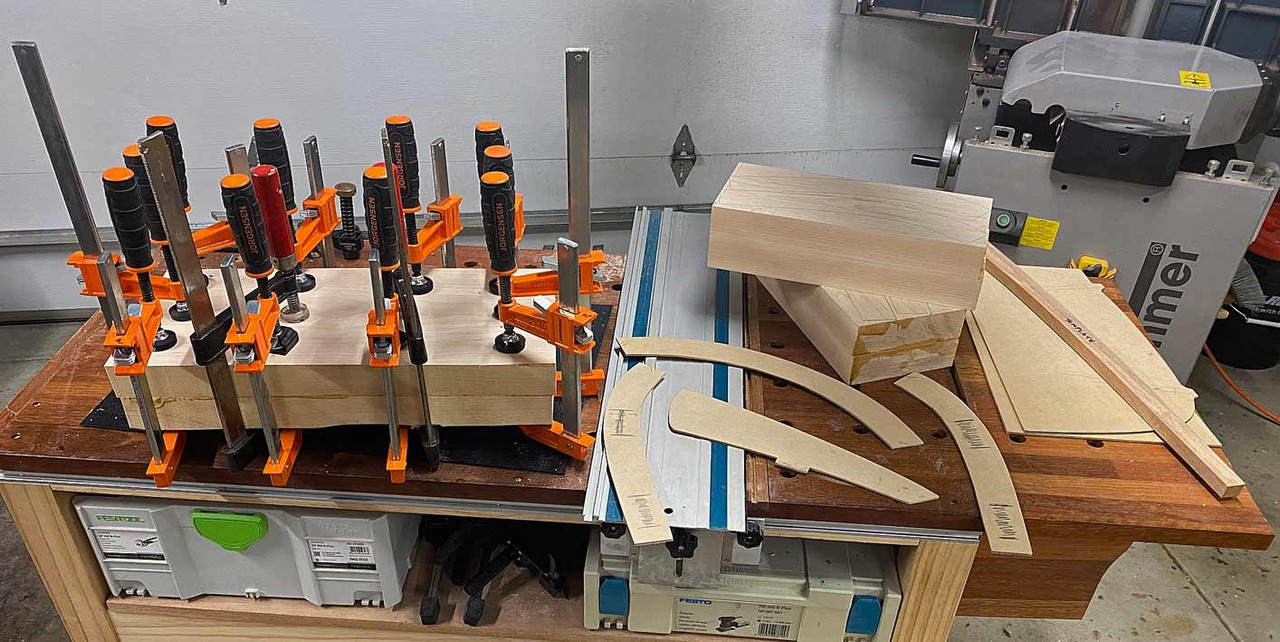
The arms need to be shaped from blocks 90mm high, so I got busy laminating ...

And while this was drying, time was spent on getting the profile for the side of the arms ...
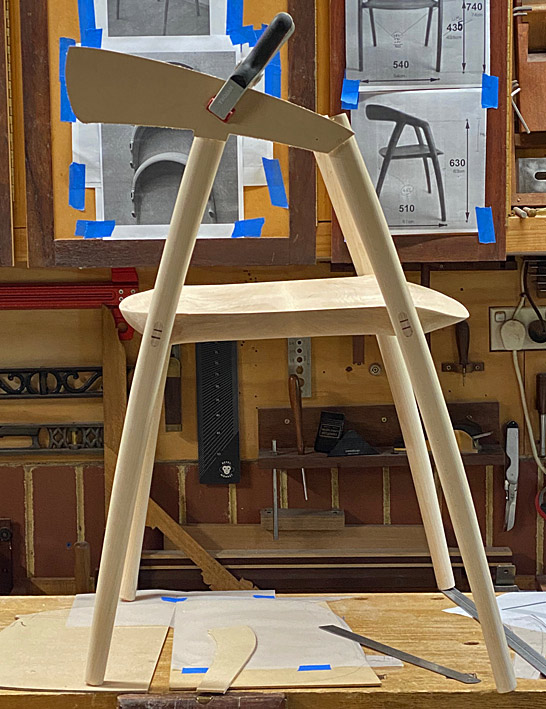
There's a photo on the wall behind against which to compare. Also, a first look at the completed through tenons.
That's the easy stuff. Time to design the arm and back profiles.
We start with a seat ...

... to use to frame around ...
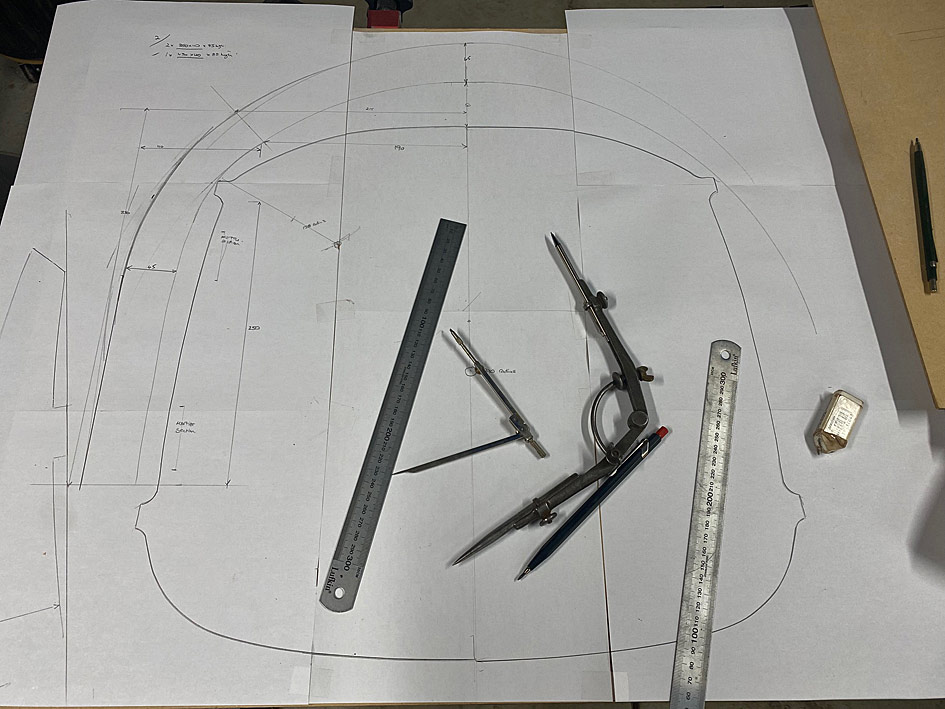
After much back-and-fro drawing, rubbing out, re-drawing, and transfering to MDF for templates ...
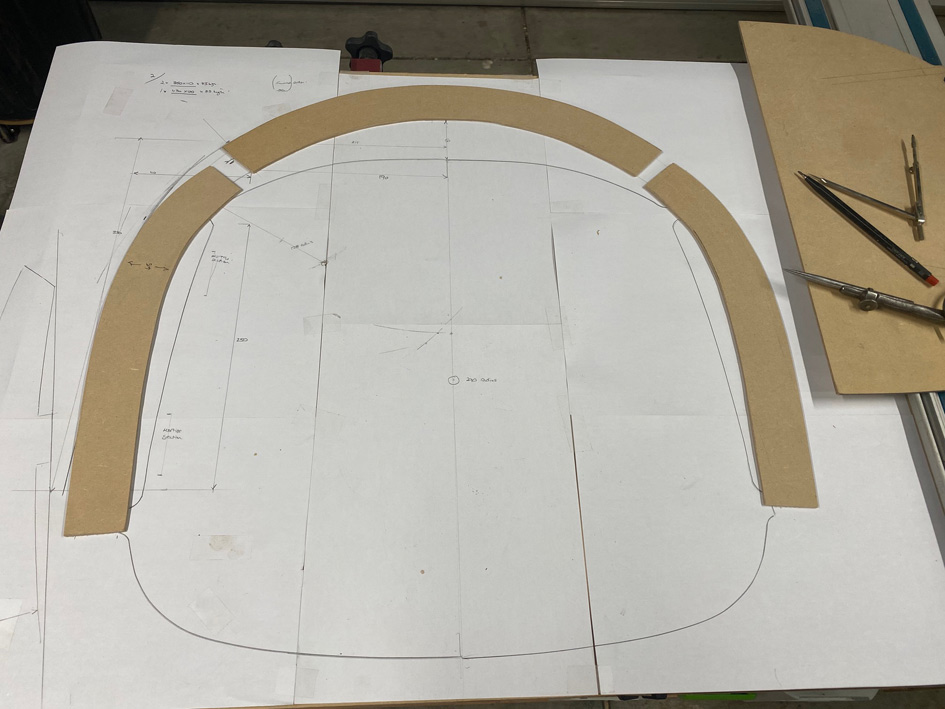
Each of the blocks (seen beng glued up earlier) create four arm blanks ...
Here is the side elevation ...
Wood for the backs came from sawing up this 3m long board ...

And, for now, the backs are laminated and drying alongside the other blanks and templates ..
Tomorrow I shall begin cutting it all up, and joining pieces together.
A question for all is how you might connect/join the arms with the legs? Note that the back will be joined angled to the sides, as per the photo.
Regards from Perth
Derek
 Posting Permissions
- You may not post new threads
- You may not post replies
- You may not post attachments
- You may not edit your posts
-
Forum Rules


 Reply With Quote